Top Birdhouse Styles That Buyers Look For

0

Top Birdhouse Styles That Buyers Look For

Top Birdhouse Styles That Buyers Look For

Birdhouses have become an increasingly popular addition to backyards and gardens, offering a delightful way to attract feathered friends and enhance the natural beauty of the surroundings. With a wide array of styles available, choosing the perfect birdhouse can be a daunting task. To assist discerning buyers, this article explores the top birdhouse styles that consistently capture the hearts of bird enthusiasts.

Classic Birdhouses

Classic birdhouses are timeless designs that exude a sense of charm and nostalgia. These traditional styles have stood the test of time and remain beloved for their simplicity and elegance. The most recognizable feature of a classic birdhouse is its simple rectangular or square shape, typically with a pitched roof and a small entrance hole.

Colonial Birdhouses

Colonial birdhouses are inspired by the architectural style of colonial America, featuring a classic gable roof with a distinctive overhang and decorative trim. They often have a small, rectangular base and a single entrance hole centered on the front. These birdhouses evoke a sense of history and add a touch of sophistication to any outdoor space.

Victorian Birdhouses

Victorian birdhouses embrace the ornate and intricate details that characterized the Victorian era. These birdhouses often feature elaborate scrollwork, decorative accents, and a variety of roof shapes, such as gables, turrets, or even cupolas. They can be crafted from a range of materials, including wood, metal, or even ceramic, and are known for their whimsical and charming appearance.

Modern Birdhouses

Modern birdhouses break away from traditional designs, embracing contemporary aesthetics and innovative materials. They often feature clean lines, geometric shapes, and minimalist detailing. These birdhouses are designed to seamlessly integrate into modern landscapes and add a touch of sophistication to any outdoor environment.

Geometric Birdhouses

Geometric birdhouses feature bold, angular shapes that create a visually striking presence. They may be crafted in the form of cubes, cylinders, or pyramids, with contrasting colors and textures to add depth and interest. These birdhouses are ideal for those seeking a modern and edgy look.

Minimalist Birdhouses

Minimalist birdhouses prioritize simplicity and functionality. They often have a simple, uncluttered design with a single entrance hole and a flat roof. They may be crafted from natural materials like wood or bamboo, or from modern materials like metal or acrylic.

Specialty Birdhouses

Specialty birdhouses are designed to cater to specific bird species or offer unique features. They can be found in a wide range of shapes, sizes, and materials, reflecting the creativity of birdhouse enthusiasts.

Bluebird Houses

Bluebird houses are specifically designed to attract bluebirds. They typically have a single entrance hole that is relatively small, around 1.5 inches in diameter, to deter larger birds. They are often crafted from wood and may feature a removable floor for easy cleaning.

Squirrel-Proof Birdhouses

Squirrel-proof birdhouses are designed to protect birds from pesky squirrels. They feature various deterrents, such as a metal shield around the entrance hole, a slippery surface, or a baffle that discourages squirrels from climbing. These birdhouses provide a safe haven for birds, ensuring they have a peaceful place to nest and raise their young.

Hanging Birdhouses

Hanging birdhouses are designed to be suspended from a branch or a hook. They often have a rounded shape or a dome-like roof, providing shelter and protection from the elements. Hanging birdhouses are a popular choice for those seeking a whimsical and space-saving option.

Factors to Consider When Choosing a Birdhouse

When selecting a birdhouse, several factors should be taken into account to ensure it meets the specific needs of the birds and the aesthetic preferences of the homeowner.

Bird Species

Different bird species have different preferences for nest boxes. It's essential to consider the size and shape of the entrance hole, the depth of the nesting cavity, and the overall dimensions of the birdhouse. For example, small songbirds require smaller houses with entrance holes around 1.25 inches in diameter, while larger birds like woodpeckers need larger houses with entrance holes of 2 inches or more.

Material

Birdhouses are typically made from a variety of materials, each with its own advantages and disadvantages. Wood is a natural and attractive choice, but it requires regular maintenance to prevent decay. Metal birdhouses are durable and long-lasting but can become hot in direct sunlight. Plastic birdhouses are affordable and easy to clean, but they may not be as aesthetically pleasing as other materials.

Placement

The placement of a birdhouse is crucial to its success in attracting birds. It should be located in a quiet and sheltered spot, away from predators and disturbances. The entrance hole should face away from prevailing winds and heavy rainfall. For optimal results, place the birdhouse at least 5 feet above the ground and at least 10 feet away from any trees or shrubs that could provide hiding spots for predators.

Maintenance

Regular maintenance is essential to keep a birdhouse clean and safe for its feathered occupants. Clean the birdhouse thoroughly after each nesting season to remove debris, droppings, and parasites. Check for any damage or signs of wear and repair or replace the birdhouse as needed.

Conclusion

Choosing the perfect birdhouse is a delightful journey that allows bird enthusiasts to express their individuality and create a welcoming haven for feathered friends. From classic designs to modern styles, there's a birdhouse to suit every taste and preference. By considering factors such as bird species, material, placement, and maintenance, buyers can find a birdhouse that not only attracts birds but also enhances the natural beauty of their outdoor spaces.

Read more

Download Free PDF Plans to Build a Stylish Bedside Cabinet

0

Download Free PDF Plans to Build a Stylish Bedside Cabinet

Download Free PDF Plans to Build a Stylish Bedside Cabinet

A bedside cabinet is an essential piece of furniture in any bedroom. It provides a convenient place to store books, lamps, alarm clocks, and other necessities. A well-designed bedside cabinet can also add a touch of style and elegance to your bedroom décor. If you're looking for a way to add a unique and personal touch to your bedroom, building your own bedside cabinet is a great option.

Building a bedside cabinet from scratch can be a rewarding experience, and with the right plans, it's also surprisingly easy. In this article, we'll guide you through the process of finding free PDF plans to build a stylish bedside cabinet, from choosing the right plan to selecting materials and assembling your masterpiece.

Why Choose Free PDF Plans?

Free PDF plans offer a number of advantages over purchasing pre-made plans or relying on DIY tutorials. Here's why they're a great choice for your bedside cabinet project:

  • Cost-Effective: Free plans eliminate the upfront cost of purchasing plans, allowing you to stretch your budget further.
  • Wide Selection: You'll find a vast array of free plans online, offering diverse styles, sizes, and complexities to match your taste and skill level.
  • Printable and Convenient: PDF format provides easy access and printing, allowing you to refer to the plans anytime, anywhere.
  • Detailed Instructions: Most free PDF plans are comprehensive and include detailed step-by-step instructions, cutting lists, and assembly diagrams.

Finding Free PDF Plans: Resources and Tips

The internet is a treasure trove of free PDF plans for various projects, including bedside cabinets. Here are some reliable sources and tips for finding the perfect plans for your needs:

Popular Online Platforms

  • Ana White: Ana White's website is a go-to resource for DIY furniture plans, offering a range of free bedside cabinet designs.
  • Instructables: This platform features user-submitted projects and instructions, including numerous free bedside cabinet plans.
  • Pinterest: Pinterest is a great platform for visual inspiration. You can find countless images and links to free PDF plans for bedside cabinets.
  • Free Plans Websites: Websites dedicated to providing free DIY plans, such as Woodworking for Mere Mortals and FreeWoodworkingPlans.com, are excellent starting points.

Tips for Choosing the Right Plan

  • Define Your Needs: Before you start searching, determine the size, style, and features you need in your bedside cabinet.
  • Consider Skill Level: Choose plans that align with your woodworking expertise. Start with beginner-friendly plans if you're new to woodworking.
  • Review Plan Details: Carefully examine the PDF plans to ensure they include all the necessary information: cutting lists, assembly diagrams, and clear instructions.
  • Read User Reviews: If available, check user reviews or comments on the plans to get an idea of their quality and ease of use.

Essential Materials for Your Bedside Cabinet

Once you've chosen your free PDF plans, you'll need to gather the necessary materials. Common materials used for bedside cabinets include:

  • Wood: Plywood, MDF, or solid wood (like pine or oak) are popular choices. Consider factors like durability, cost, and desired aesthetic.
  • Hardware: Hinges, drawer slides, knobs, and handles are essential for functionality and style.
  • Fasteners: Screws, nails, and glue are needed to secure the cabinet parts.
  • Finish: Paint, stain, or varnish can enhance the look and protect the wood.
  • Tools: You'll need basic woodworking tools, including a saw, drill, sander, and measuring tape.

Building Your Stylish Bedside Cabinet: Step-by-Step Guide

With your chosen PDF plans and materials ready, you're ready to start building your bedside cabinet. Here's a general step-by-step guide to help you along the way:

Step 1: Cutting and Preparation

  • Carefully review the cutting list provided in your PDF plans.
  • Use your saw to accurately cut the wood according to the plan dimensions.
  • Sand the edges and surfaces of all wood pieces to create a smooth finish.

Step 2: Assembly

  • Follow the assembly instructions in your plans step-by-step.
  • Use glue and fasteners to secure the cabinet parts, ensuring a strong and stable structure.
  • Install drawer slides, hinges, and hardware as directed.

Step 3: Finishing Touches

  • Sand any rough spots or imperfections for a smooth surface.
  • Apply your chosen finish, such as paint, stain, or varnish, following the manufacturer's instructions.
  • Allow the finish to dry completely before moving on to the next step.

Step 4: Installation

  • Place your completed bedside cabinet next to your bed, ensuring it's level and stable.
  • Secure the cabinet to the wall if necessary, using appropriate mounting hardware.

Conclusion

Building your own bedside cabinet is a fulfilling project that allows you to create a piece of furniture perfectly tailored to your needs and style. With the abundance of free PDF plans available online, the process is simpler than you might think. By carefully following the instructions and selecting quality materials, you can build a stylish and functional bedside cabinet that adds a touch of personality to your bedroom.

So, unleash your creativity, gather your tools, and start building! You'll enjoy the satisfaction of creating something unique and beautiful for your home.

Read more

How to Make a Compost Bin from Recycled Materials

0

How to Make a Compost Bin from Recycled Materials

Turn Trash into Treasure: Building a Compost Bin from Recycled Materials

Hey there, fellow earth lovers! Ready to ditch the landfill and transform your kitchen scraps into rich, black gold? Let's get our hands dirty and build a compost bin from recycled materials! Not only is it a super eco-friendly way to manage your food waste, but it's also a fun and rewarding project. Plus, you'll be saving some serious cash by skipping out on buying a fancy compost bin.

Don't worry, we're not talking about building a complex engineering marvel here. This is a simple, DIY project that's perfect for beginners. We're gonna be utilizing things you might already have lying around the house or easily find at your local recycling center. So, let's dive in!

Choosing Your Compost Bin Style

First things first, you need to decide what type of compost bin you want to make. There are a bunch of awesome options out there, but we'll focus on two popular choices:

The Three-Bin System

This classic setup involves three separate bins. Each bin serves a different purpose:

  • Bin 1: The Hot Composting Bin - This is where the magic happens! This bin is where you add your kitchen scraps, yard waste, and other compostable materials. The heat generated by the decomposition process will break down the materials quickly.
  • Bin 2: The Curing Bin - This bin is for the finished compost. Once the materials in the hot bin have broken down, you'll transfer them to the curing bin to continue their journey to perfection. The curing process helps the compost mature and become more stable.
  • Bin 3: The Storage Bin - This bin is your "waitlist" for compostable materials. It's a great place to hold materials until you're ready to add them to the hot bin.

The beauty of the three-bin system is that it allows you to keep your compost in different stages of decomposition. You can always have fresh compost ready to go!

The Single-Bin System

If you're looking for a simpler and more compact option, the single-bin system is perfect for you. This system is essentially a single bin where you add your materials and let nature take its course. It's not as efficient as the three-bin system in terms of speed, but it's super easy to manage and requires less space.

Gathering Your Recycled Treasures

Now that you've chosen your compost bin style, it's time to get creative with your recycled materials. Here are some ideas to get your gears turning:

  • Wooden Pallets - These are a fantastic, readily available resource. They can be used to build both the three-bin and single-bin systems. Just make sure the wood is free of any harmful chemicals or treatments.
  • Plastic Storage Bins - Those sturdy, colorful bins you use to store your belongings are perfect for creating compost bins. You can use them to build the three-bin system or even stack them to create a single-bin setup.
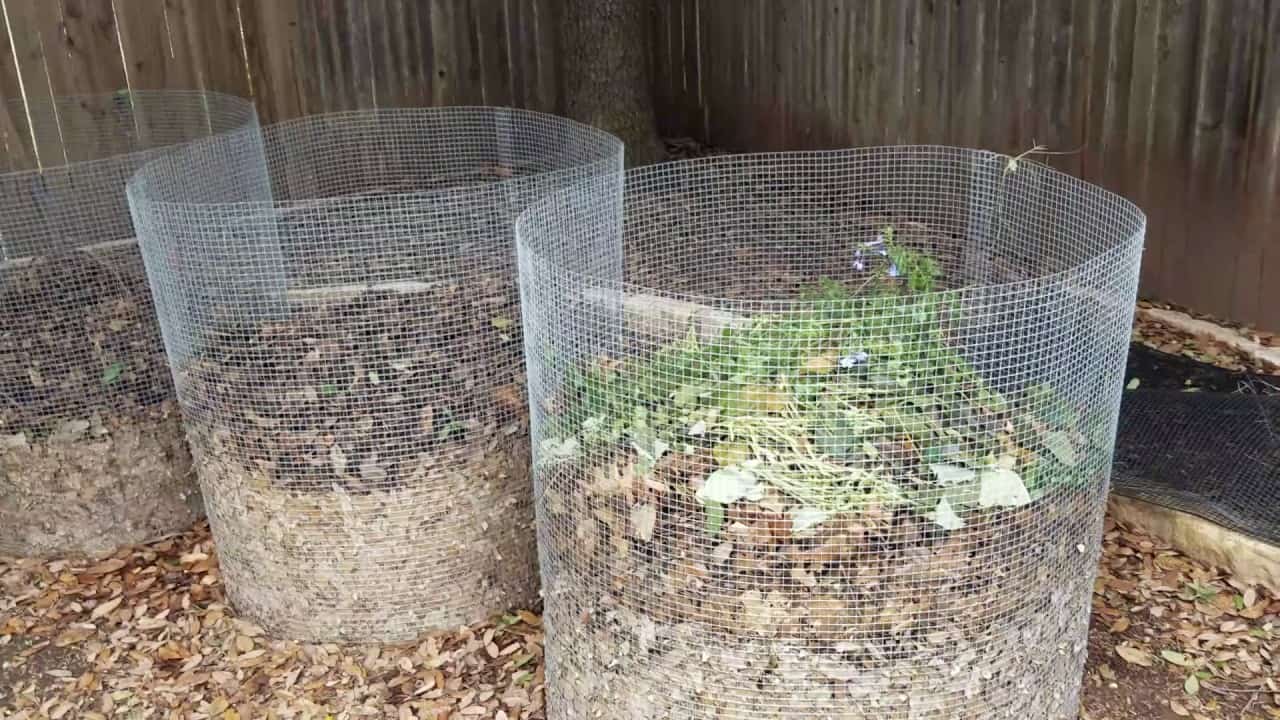
  • Metal Trash Cans - Old metal trash cans, particularly those with lids, make excellent compost bins. The metal is durable and helps retain heat. Just make sure there are no holes or leaks.
  • Old Tires - If you have some old tires lying around, they can be used to create a unique and interesting compost bin. You can stack them on top of each other or create a circle. Just make sure the tires are clean and free of any harmful chemicals.
  • Concrete Blocks - Concrete blocks can be used to build the walls of your compost bin. They provide a sturdy and long-lasting structure.

Building Your Compost Bin

Okay, now for the fun part! Let's build that compost bin! Here's a basic guide for constructing a three-bin system using wooden pallets:

  1. Prepare the Pallets: Clean the pallets thoroughly and remove any nails, staples, or loose boards. Use a saw to cut the pallets to the desired size for your bins. It's a good idea to choose pallets with a similar width and height for a uniform look.
  2. Assemble the Bins: For each bin, you'll need three pallet sections. Attach the sections to each other using screws or heavy-duty nails to create a rectangular frame. Make sure the joints are strong and secure. For the hot and curing bins, you'll need a bottom made of mesh wire or chicken wire. This allows for air circulation and drainage. For the storage bin, a solid bottom is fine. You can use wood scraps or even heavy-duty cardboard.
  3. Create the Three-Bin Configuration: Arrange the three bins side by side, leaving a small gap between them for easy access. If you want to, you can attach the bins to each other using screws or heavy-duty brackets for a more stable structure.
  4. Add a Lid (Optional): A lid can help retain heat and moisture in the hot bin, but it's not essential. You can use a piece of wood or even a large piece of plastic sheeting to create a simple lid. Make sure the lid is secured so it won't blow away in the wind.

For a single-bin system, you'll essentially follow the same steps, but you'll only need to build one bin. You can use any of the recycled materials mentioned earlier to construct it.

Composting: The Art of Turning Waste into Gold

Now that your compost bin is built, it's time to start composting! Here are some tips for a successful compost pile:

  • Balance Your Green and Browns: Compost requires a balance of "green" materials (nitrogen-rich) and "brown" materials (carbon-rich). Think of it as a perfect harmony of food scraps (green) and yard waste (brown). A good ratio is about 2 parts brown to 1 part green.
  • Add Water Regularly: Your compost needs to be moist, but not soggy. Think of the consistency of a wrung-out sponge. Add water regularly, especially during dry periods.
  • Turn Your Compost: To ensure even decomposition, turn your compost pile regularly. You can do this every couple of weeks using a pitchfork or garden rake. This helps aerate the compost and allows for proper oxygen flow.
  • Avoid Certain Materials: Not everything is compostable. Stay away from meat, bones, dairy products, oils, and diseased plants. These materials can attract pests and can slow down the decomposition process.

The Rewards of Composting

Composting isn't just about reducing waste; it's about nurturing your garden and enriching the soil. Here's what you can expect from your compost:

  • Healthy Soil: Compost adds essential nutrients and improves soil structure, creating a thriving environment for your plants.
  • Reduced Waste: By composting, you're diverting waste from landfills and promoting a more sustainable lifestyle.
  • Free Fertilizer: Compost is a fantastic natural fertilizer that can help you grow healthy and vibrant plants.
  • Sense of Accomplishment: There's something incredibly satisfying about watching your kitchen scraps transform into rich, black gold. It's a reminder of the interconnectedness of nature and the power of simple actions.

So, what are you waiting for? Get creative, gather your recycled materials, and start building your own compost bin today! It's a rewarding journey that will benefit you, your garden, and the planet. Happy composting!

Read more

Diy wooden magic box: a beginner-friendly guide

0

Diy wooden magic box: a beginner-friendly guide

DIY Wooden Magic Box: A Beginner-Friendly Guide

Unlock the magic of woodworking and create a captivating wooden magic box with this beginner-friendly guide. This project combines simple techniques with a touch of creative flair, allowing you to construct a stunning and functional piece of art. Whether you’re a seasoned woodworker or just starting out, this guide will walk you through each step, ensuring a smooth and rewarding experience.

Gather Your Supplies

Before embarking on your magical journey, ensure you have all the necessary tools and materials at hand. Here’s a comprehensive list:

Wood

  • One piece of plywood or hardwood (approximately 12" x 12" x ½") for the base and lid
  • Four pieces of wood (approximately 4" x 4" x ½") for the sides
  • Two pieces of wood (approximately 3" x 4" x ½") for the hinges

Tools

  • Saw (circular saw or jigsaw)
  • Drill
  • Sandpaper (various grits)
  • Screwdriver or drill bits for screws
  • Wood glue
  • Clamps
  • Measuring tape
  • Pencil
  • Wood stain or paint (optional)
  • Finishing sealant (optional)

Construct the Base and Lid

Begin by creating the foundation of your magic box. Use your saw to cut the plywood or hardwood into two squares, each measuring 12" x 12". These squares will form the base and the lid. Ensure all edges are clean and straight. Now, carefully sand the edges of both squares using sandpaper to create a smooth and polished finish.

Assembling the Sides

Next, cut four pieces of wood into 4" x 4" squares to form the sides of the box. Use wood glue to secure each side to the base, ensuring they are flush with the edges. Secure the sides in place using clamps, allowing the glue to dry completely.

Crafting the Hinges

To create the hinges, cut two pieces of wood into 3" x 4" rectangles. Carefully drill two holes along the length of each rectangle, spaced approximately ½" apart. These holes will accommodate the screws for attaching the hinges to the box.

Attaching the Hinges

Align the hinges with the top edge of the box and attach them using screws. Ensure the hinges are positioned evenly on both sides. Now, carefully attach the lid to the hinges, making sure it aligns perfectly with the base.

Adding a Finishing Touch

To enhance the visual appeal of your wooden magic box, consider staining or painting it with your preferred color. Alternatively, you can apply a clear sealant to protect the wood and give it a glossy finish. Allow the stain, paint, or sealant to dry completely before proceeding.

The Final Touches

Congratulations! Your DIY wooden magic box is complete. Decorate it with your own personal touch, adding embellishments like decorative knobs, intricate carvings, or even hidden compartments to further enhance its charm. As you create, envision the secrets and mysteries your box will hold, adding a touch of enchantment to your world.

Read more

Winter Gardening Tips: Cold Frame Plans

0

Winter Gardening Tips: Cold Frame Plans

Winter Gardening Tips: Cold Frame Plans

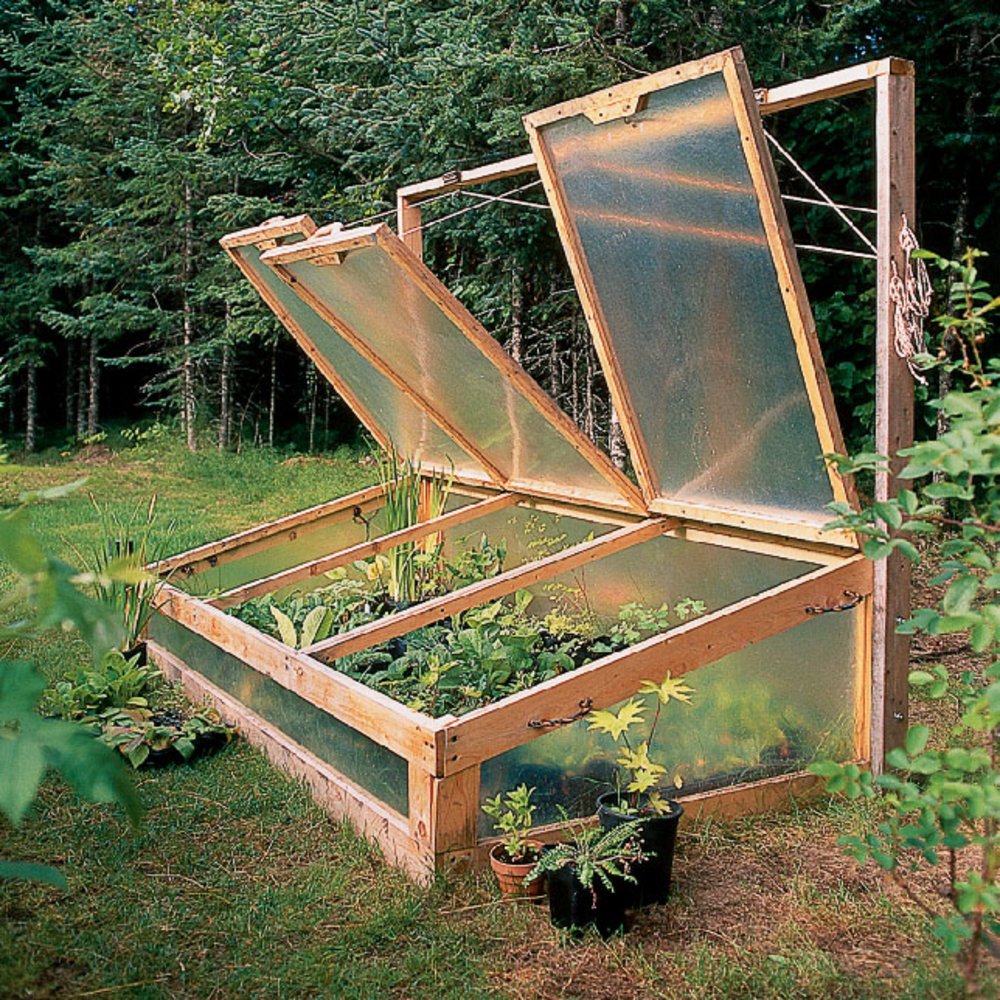
Winter gardening can be a rewarding experience, extending the growing season and providing fresh produce even when the weather is cold. A cold frame is an essential tool for winter gardening, acting as a mini-greenhouse that protects plants from frost and harsh conditions. This article delves into the benefits of cold frames and provides comprehensive plans for building your own, empowering you to cultivate a thriving winter garden.

Benefits of Using a Cold Frame

Cold frames offer numerous advantages for winter gardening:

  • Extended Growing Season: Cold frames create a microclimate that is warmer than the surrounding air, allowing you to grow plants earlier in the spring and later in the fall.
  • Frost Protection: The glass or plastic cover of a cold frame traps heat from the sun, preventing frost damage to delicate plants.
  • Improved Seed Germination: The warmer soil temperatures within a cold frame promote faster and more successful seed germination.
  • Reduced Heating Costs: Cold frames utilize solar energy to warm the plants, minimizing the need for artificial heating.
  • Pest Control: The enclosed environment of a cold frame helps to deter pests and insects.
  • Water Conservation: The enclosed space reduces water evaporation, helping to conserve water resources.

Cold Frame Design Considerations

Before constructing your cold frame, consider these important factors:

Location

Choose a sunny location with good drainage. The cold frame should receive at least 6 hours of direct sunlight per day, ideally facing south.

Size and Shape

The size of your cold frame will depend on your gardening needs. A typical cold frame is 4 feet wide by 8 feet long, but smaller or larger versions can be built. The shape can be rectangular, square, or even curved.

Materials

Cold frames can be made from various materials, including:

  • Wood: Wood is a durable and aesthetically pleasing material. It can be treated with weather-resistant sealant for longevity.
  • Concrete Blocks: Concrete blocks are sturdy and readily available. They offer good insulation and longevity.
  • Metal: Metal frames are lightweight and can be easily assembled. However, they may require rust protection.
  • Recycled Materials: Old windows, pallets, or other materials can be repurposed to create a cold frame.

Covering

The covering of a cold frame is crucial for trapping heat and protecting plants. Common options include:

  • Glass: Glass is a good insulator, but it can be heavy and fragile.
  • Plastic: Plastic is lightweight, inexpensive, and readily available. However, it can tear easily and may not be as durable as glass.
  • Polycarbonate: Polycarbonate is a durable, transparent plastic that is resistant to breakage and UV rays. It is a good choice for long-lasting cold frames.

Cold Frame Plans

Here are two detailed plans for building a cold frame:

Wood Frame Cold Frame Plan

Materials:

  • 4x4 lumber for the frame (8 pieces)
  • 1x6 lumber for the sides (8 pieces)
  • 1/2-inch plywood for the bottom
  • Glass or plastic for the cover
  • Wood screws
  • Weather-resistant sealant
  • Hinges
  • Latch

Instructions:

  1. Cut the 4x4 lumber to the desired length for the frame.
  2. Assemble the frame using wood screws, creating a rectangle or square.
  3. Cut the 1x6 lumber to the desired height for the sides.
  4. Attach the side boards to the frame using screws.
  5. Cut a piece of plywood to fit the bottom of the frame.
  6. Attach the plywood to the frame with screws.
  7. Cut the glass or plastic to the desired size for the cover.
  8. Attach hinges to the cover and frame.
  9. Install a latch to secure the cover.
  10. Apply weather-resistant sealant to all joints and seams.

Concrete Block Cold Frame Plan

Materials:

  • Concrete blocks (20-30)
  • Wooden frame for the cover (optional)
  • Glass or plastic for the cover
  • Mortar mix
  • Hinges
  • Latch

Instructions:

  1. Lay out the concrete blocks in the desired shape for the frame.
  2. Use mortar mix to bond the blocks together, creating a strong and durable structure.
  3. Construct a wooden frame for the cover (optional).
  4. Cut the glass or plastic to the desired size for the cover.
  5. Attach hinges to the cover and frame.
  6. Install a latch to secure the cover.

Cold Frame Maintenance

Proper maintenance is essential for keeping your cold frame in optimal condition and extending its lifespan:

  • Ventilation: Open the cover on sunny days to allow for air circulation and prevent overheating. Close it at night to conserve heat.
  • Watering: Water your plants regularly, as the enclosed environment can dry out quickly.
  • Cleaning: Clean the inside and outside of the cold frame regularly to remove dirt and debris.
  • Inspection: Regularly check for damage to the frame, cover, and hinges.

Cold Frame Gardening Tips

Here are some additional tips for successful winter gardening in a cold frame:

  • Choose Cold-Hardy Plants: Select plants that are known for their tolerance to cold temperatures, such as lettuce, spinach, kale, carrots, and radishes.
  • Start Seeds Indoors: For earlier harvests, start seeds indoors and transplant them into the cold frame when they are a few weeks old.
  • Provide Insulation: Add a layer of straw or other insulating material to the bottom of the cold frame to further protect plants from frost.
  • Monitor Temperatures: Use a thermometer to track the temperature inside the cold frame. Adjust the cover as needed to maintain optimal temperatures for your plants.
  • Protect from Wind: Place a windbreak around the cold frame to reduce windchill and protect plants from cold winds.

By following these tips and plans, you can successfully build and utilize a cold frame to extend your growing season and enjoy fresh produce throughout the winter months.

Read more

BeginnerÂ’s Cold Frame Plans for Easy Gardening

0

Beginner’s Cold Frame Plans for Easy Gardening

Beginner’s Cold Frame Plans for Easy Gardening

A cold frame is a simple, inexpensive structure that extends your gardening season by providing a protected environment for plants. It acts as a mini-greenhouse, trapping solar heat and protecting plants from the elements, allowing you to start seeds earlier in the spring and extend the growing season into the fall.

This article will guide you through the steps of building your own cold frame, providing you with clear instructions and helpful tips for a successful project. You’ll learn about the materials needed, the construction process, and valuable tips for using your cold frame effectively.

Benefits of Using a Cold Frame

Investing in a cold frame offers numerous advantages for gardeners of all levels:

  • Extended Growing Season: Start seeds weeks earlier in the spring and harvest crops later in the fall, thanks to the protected environment.
  • Hardening Off Seedlings: Acclimate seedlings to outdoor conditions gradually before transplanting them into the garden.
  • Protection from Frost: Shield delicate plants from frost and cold temperatures, allowing you to grow a wider range of crops.
  • Improved Soil Moisture: The enclosed environment helps retain soil moisture, reducing the need for frequent watering.
  • Pest and Disease Control: The protective cover acts as a barrier against pests and diseases, promoting healthier plants.
  • Cost-Effective Solution: A cold frame is a relatively inexpensive way to expand your gardening capabilities.

Choosing the Right Location for Your Cold Frame

The location of your cold frame will greatly influence its effectiveness. Choose a spot that meets the following criteria:

  • Full Sun: Select a sunny location that receives at least six hours of direct sunlight daily. This will ensure adequate warmth for your plants.
  • Well-Drained Soil: Avoid areas prone to waterlogging, as this can damage your plants. Choose a site with well-drained soil to prevent root rot.
  • Easy Access: Ensure the location is easily accessible for tending to your plants, harvesting crops, and cleaning the frame.
  • Protection from Wind: A sheltered location is ideal to minimize wind exposure, which can cool the frame and damage delicate plants.

Simple Cold Frame Plans: Materials and Construction

Here's a straightforward cold frame plan that is beginner-friendly and easy to construct:

Materials Needed:

  • Wood: Use treated lumber for durability. You will need 2x4s for the frame and 1x6s for the sides and top.
  • Plastic Sheeting: Choose clear plastic sheeting that is at least 6 mil thick for insulation and durability.
  • Screws: Use galvanized screws for outdoor use.
  • Tape Measure: For accurate measurements.
  • Level: To ensure the frame is level.
  • Circular Saw: To cut the lumber to size.
  • Drill: To drill pilot holes before screwing the wood together.
  • Safety Glasses and Gloves: For protection during construction.

Construction Steps:

  1. Cut the Lumber: Measure and cut the lumber for the frame and sides. You will need two long pieces for the base, two shorter pieces for the ends, and four pieces for the sides.
  2. Assemble the Frame: Attach the base pieces to the end pieces using screws. Make sure the corners are square and secure.
  3. Add the Sides: Attach the side pieces to the frame, ensuring they are vertical and flush with the base. Use screws to secure them.
  4. Create the Top: Attach the top pieces to the sides, creating a hinged lid. Use screws to secure the lid and hinges.
  5. Install the Plastic: Cut the plastic sheeting to size and secure it to the frame using staples, tape, or clamps. Overlap the plastic by several inches to create a watertight seal.
  6. Place the Cold Frame: Position the cold frame in its chosen location and adjust the legs for level placement.

Using Your Cold Frame Effectively

Once you have constructed your cold frame, here are some essential tips for using it successfully:

Starting Seeds:

  • Choose the Right Seeds: Select seeds that are suitable for cold frame conditions. Look for varieties that can tolerate cool temperatures.
  • Use Seed Starting Mix: Use a specialized seed starting mix that drains well and provides essential nutrients for young seedlings.
  • Water Regularly: Keep the seed starting mix moist but not soggy. Check the moisture levels daily and water as needed.
  • Provide Adequate Light: Ensure the seedlings receive adequate sunlight. Supplement with artificial light if necessary, especially during short winter days.
  • Thin Seedlings: Once seedlings have developed a few true leaves, thin them out to give them space to grow.

Hardening Off Seedlings:

Before transplanting seedlings into the garden, harden them off to acclimate them to outdoor conditions. This process gradually exposes them to sun, wind, and temperature fluctuations.

  • Start Gradually: Begin by opening the cold frame lid for short periods during the day, increasing the time gradually over several days.
  • Protect from Extreme Conditions: During cold nights or windy days, close the lid to protect the seedlings.
  • Transplant When Ready: Once seedlings have adapted to the outdoor environment, they are ready to be transplanted into the garden.

Extending the Growing Season:

A cold frame can extend your harvest season by providing a protected environment for late-season crops.

  • Choose Cold-Hardy Crops: Select crops that can tolerate cooler temperatures, such as lettuce, kale, spinach, and radishes.
  • Protect from Frost: On frosty nights, cover the cold frame with an extra layer of insulation, such as a blanket or tarp.
  • Monitor Soil Temperature: Ensure the soil temperature remains suitable for the crops you are growing.

Maintenance Tips for Your Cold Frame

Regular maintenance will ensure your cold frame continues to function effectively and protect your plants.

  • Clean Regularly: Remove debris and weeds from inside the frame to prevent disease and pests.
  • Check for Damage: Inspect the frame, plastic sheeting, and hinges for any damage and repair as needed.
  • Adjust Ventilation: Adjust the lid to regulate air flow and temperature inside the frame.
  • Winterize: In colder regions, prepare the cold frame for winter by removing plants, cleaning it thoroughly, and covering it with a tarp or other protective material.

Conclusion

Building your own cold frame is a simple and rewarding project that can significantly enhance your gardening experience. By following these plans and tips, you can easily create a protected environment for your plants, extending the growing season and enjoying fresh produce for longer periods. Embrace the benefits of a cold frame and reap the rewards of a bountiful garden.

Read more

Squirrel Box Project: Plans for All Skill Levels

0

Squirrel Box Project: Plans for All Skill Levels

Squirrel Box Project: Plans for All Skill Levels

Hey there, fellow nature lovers! Are you tired of those pesky squirrels raiding your bird feeders? Well, instead of getting frustrated, why not turn this into a fun project? Building a squirrel box is a great way to provide shelter and a safe haven for these playful critters while keeping them away from your birdseed. Plus, it's a fantastic way to get outside, enjoy some woodworking, and appreciate the beauty of nature up close.

This article is your guide to building squirrel boxes for all skill levels, from beginner DIYers to seasoned woodworkers. We'll cover everything from basic designs to more elaborate creations, so you can choose the perfect project for your skills and preferences.

Why Build a Squirrel Box?

Building a squirrel box is a rewarding experience that benefits both you and the squirrels. Here's why you should consider adding one to your backyard:

  • Provide a Safe Home for Squirrels: Squirrels are natural tree dwellers, and sometimes they need a helping hand to find a secure place to rest, raise their young, and escape predators. Your squirrel box can be their refuge.
  • Keep Squirrels Away from Bird Feeders: By providing a separate, designated area for squirrels to feed, you can discourage them from raiding your bird feeders, leading to less frustration and more birdwatching enjoyment for you.
  • Connect with Nature: Building and placing a squirrel box encourages you to observe and appreciate these fascinating creatures in their natural environment. You can learn about their behaviors, feeding habits, and social interactions.
  • A Fun DIY Project: Building a squirrel box is a satisfying and creative project that allows you to put your woodworking skills to the test. You can customize the design and add unique features to make it your own.

Squirrel Box Design Basics

Before you start hammering and sawing, let's lay down the basics of a good squirrel box design. It's not rocket science, but it's important to consider a few key elements for the well-being of your furry tenants:

Size and Shape

A typical squirrel box should be around 12 inches wide, 12 inches deep, and 16 inches tall. The box should be rectangular or slightly square in shape, providing enough space for the squirrels to comfortably move around.

Entry Hole

The entry hole should be about 3-4 inches in diameter, located on one of the sides of the box. This size allows squirrels to easily enter but prevents larger animals like raccoons from accessing the box.

Ventilation

Proper ventilation is crucial to prevent moisture buildup inside the box. You can achieve this by adding a few small vent holes near the top of the box. Make sure the holes are small enough to prevent squirrels from escaping or predators from entering.

Roof and Floor

The roof should be sloped to prevent water from pooling and the floor should be flat and solid. You can use a simple plywood sheet for both the roof and floor.

Material

The most common material for squirrel boxes is cedar or pine. These woods are naturally resistant to rot and insects, making them ideal for outdoor use.

Squirrel Box Project: Beginner Level

For beginners, a simple and straightforward design is the perfect starting point. This project requires basic woodworking skills and tools, making it a great way to get your feet wet and learn as you go.

Materials You'll Need:

  • Cedar or pine boards (1x12) - approximately 12 feet
  • Wood screws
  • Drill
  • Saw (hand saw or circular saw)
  • Measuring tape
  • Pencil
  • Level
  • Hammer
  • Safety glasses

Instructions:

  1. Cut the boards to the desired sizes: four sides, a roof, and a floor. You'll need two identical sides, two identical ends, and a top and bottom for the box.
  2. Attach the sides to the ends, creating the box's main structure. Use wood screws to secure the joints.
  3. Cut a circular opening for the entry hole on one of the sides.
  4. Attach the floor to the bottom of the box.
  5. Cut the roof to fit and attach it to the box, allowing for a slight overhang to protect the entry hole.
  6. Drill a few small vent holes near the top of the box.
  7. Sand the box and apply a protective sealant, such as paint or stain, to prolong its lifespan.

Congratulations! You have just built your first squirrel box. Now, it's time to find the perfect spot to place it.

Squirrel Box Project: Intermediate Level

Ready for a bit more of a challenge? This intermediate project involves a more complex design and a few extra features, adding a touch of sophistication to your squirrel habitat.

Materials You'll Need:

  • Cedar or pine boards (1x6, 1x8) - approximately 16 feet
  • Wood screws
  • Drill
  • Circular saw
  • Measuring tape
  • Pencil
  • Level
  • Hammer
  • Safety glasses
  • Jigsaw (optional)
  • Small hinges (2)
  • Small latch (optional)
  • Metal roofing (optional)

Instructions:

  1. Construct the box using the same techniques as the beginner project, but with a slightly more complex design. You can add a decorative trim to the edges or create a more elaborate roof with a steeper slope.
  2. Cut a circular entry hole with a jigsaw for a smoother and more professional look.
  3. Add a hinged roof for easier access and observation. Use hinges and a small latch for added security (optional).
  4. Install a metal roofing sheet on top of the box to provide a durable and weather-resistant surface (optional).
  5. Sand the box and apply a protective sealant to prevent weather damage.

Your intermediate squirrel box is ready to be a luxurious home for your furry friends. Be sure to observe their behavior and make any adjustments to the design based on their preferences.

Squirrel Box Project: Advanced Level

For experienced woodworkers, this project offers a chance to create a truly exceptional squirrel box. It involves intricate details, custom features, and a touch of artistry, making it a rewarding challenge.

Materials You'll Need:

  • Cedar or pine boards (various sizes) - approximately 20 feet
  • Wood screws
  • Drill
  • Circular saw
  • Jigsaw
  • Router (optional)
  • Measuring tape
  • Pencil
  • Level
  • Hammer
  • Safety glasses
  • Hinges (2)
  • Latch (optional)
  • Metal roofing (optional)
  • Decorative trim (optional)
  • Wood stain (optional)
  • Paint (optional)

Instructions:

  1. Design your box with intricate details. You can include a decorative roof with a gable or curved shape, add a front porch with a railing, or even create a multi-chambered box with separate compartments for nesting and feeding.
  2. Use a router to add decorative edges or patterns to the box (optional).
  3. Install a hinged roof with a latch for easy access and observation.
  4. Add a metal roofing sheet for durability and weather resistance (optional).
  5. Sand the box thoroughly and apply a protective sealant, such as paint or stain, to enhance its appearance and lifespan.

Your advanced squirrel box will be a testament to your craftsmanship, providing a unique and aesthetically pleasing home for your feathered friends.

Choosing the Right Location

Finding the perfect spot for your squirrel box is just as important as building it. Here are a few tips to make your box a welcoming home:

  • Provide Shade and Shelter: Choose a location that offers shade from the sun and protection from rain and wind. A tree with thick foliage or a covered area is ideal.
  • Maintain a Safe Distance: Place the box at least 6 feet off the ground and a safe distance from any walkways or frequently used areas.
  • Access to Food and Water: Ensure the box is near a source of food, such as trees with nuts or seeds, and a water source, like a birdbath or pond.
  • Observe Squirrel Activity: Before installation, observe squirrels in your area to see where they frequently forage and nest. This will help you choose the most suitable spot.

Tips for Attracting Squirrels

Once you've built and placed your squirrel box, it's time to entice your furry friends to move in. Here are a few tricks to attract them:

  • Offer a Snack: Place a small amount of nuts or seeds near the entrance to the box, encouraging squirrels to explore the area.
  • Maintain Cleanliness: Keep the box clean and free of debris, making it more appealing to squirrels.
  • Provide a Safe Environment: Ensure the surrounding area is free of hazards and predators to make the box a safe haven for squirrels.
  • Be Patient: It might take some time for squirrels to discover and accept your box. Don't get discouraged, and keep offering them treats and maintaining a welcoming environment.

Building a squirrel box is a fantastic way to give back to nature, provide a safe haven for these fascinating creatures, and enjoy the rewarding experience of a fun DIY project. So, gather your tools, embrace your inner woodworker, and create a welcoming home for your neighborhood squirrels. Who knows, you might even become a local squirrel expert!

Read more

How to make a stylish wooden desk clock

0

How to make a stylish wooden desk clock

Crafting a Stylish Wooden Desk Clock: From Concept to Completion

Hey there, fellow crafters! Ready to elevate your workspace with a personalized touch? Let's dive into the world of wood and create a stunning desk clock that'll be the envy of your office.

Materials You'll Need

Before we get our hands dirty, gather these essential materials:

  • A piece of wood (think walnut, cherry, or maple for that luxurious feel)
  • Clock mechanism kit (it's usually a combo of movement, hands, and a battery)
  • Wood glue
  • Sandpaper (various grits)
  • Wood stain (optional)
  • Wood finish (polyurethane or varnish)
  • Clock hands (if you want to customize)
  • Measuring tape and ruler
  • Pencil
  • Drill with a drill bit slightly smaller than the clock mechanism shaft
  • Saw (for cutting the wood to your desired size)
  • Clamps (for holding the wood securely)

Designing Your Wooden Masterpiece

Now, let's get creative! The beauty of this project is its flexibility. Choose the shape and size you desire. A classic square or rectangle is a safe bet, but you can also go bold with a circle or a unique, flowing design.

Planning Your Clock Face

Decide on the style you want to achieve. Do you envision a minimalist clock with clean lines or a more rustic look with intricate carvings? Consider the overall theme of your workspace when making this decision.

Choosing the Right Wood

The type of wood you select will greatly impact the final look and feel of your clock. Walnut, cherry, and maple are popular choices for their rich tones and natural beauty. If you want a lighter, more contemporary aesthetic, consider birch or pine.

Sketching Your Vision

Grab your pencil and paper and sketch out a few design ideas. Play with different shapes, layouts, and potential features. This will help you visualize the final product and refine your plan.

Crafting the Clock Base

With your design in mind, it's time to bring your wooden clock to life.

Cutting the Wood

Measure and cut your chosen wood to the desired dimensions. Use a saw, ensuring your cuts are precise and smooth. For intricate shapes, consider using a jigsaw or scroll saw for greater control.

Sanding to Perfection

Once your base is cut, sand it thoroughly. Start with a coarse grit sandpaper to remove any rough edges and work your way down to a fine grit to achieve a smooth, polished surface.

Adding Detail

Now's the time to personalize your clock. You can carve intricate patterns, burn designs with a woodburning tool, or simply paint the clock face with a bold color. Let your imagination run wild!

Installing the Clock Mechanism

With the base ready, we'll install the heart of your clock.

Marking the Center

Use a ruler and pencil to find the exact center of your clock base. Mark this point carefully.

Drilling the Hole

Use your drill and a drill bit slightly smaller than the clock mechanism shaft to drill a hole at the marked center. Make sure the hole is deep enough for the mechanism to sit flush with the wood.

Securing the Mechanism

Carefully insert the clock mechanism into the hole. You might need to use a small amount of wood glue to secure it in place. Let the glue dry completely before proceeding.

Adding the Hands

Attach the clock hands to the mechanism according to the instructions provided with your kit. Make sure the hands are aligned correctly and secure them firmly.

Finishing Touches

Time to give your wooden clock a final polish!

Applying Stain (Optional)

If you want to enhance the natural beauty of your wood, apply a wood stain. Choose a stain that complements your wood type and desired color scheme. Follow the manufacturer's instructions for application and drying time.

Applying Finish

Once the stain is dry (if applied), apply a wood finish like polyurethane or varnish. This will protect your clock from scratches, moisture, and UV damage. Apply several thin coats, sanding lightly between each coat for a smooth, even finish.

Installation and Enjoyment

Let the finish dry completely. Then, install the battery according to the instructions.

Congratulations! You've just created a stunning wooden desk clock that'll add a touch of sophistication and personality to your workspace. Enjoy your masterpiece!

Tips and Tricks

Here are a few extra tips to help you create a truly unique clock:

  • For a rustic look, use reclaimed wood or distress the surface of the clock by adding scratches or chipped edges.
  • Use decorative metal washers or knobs to add a touch of elegance and contrast to the wood.
  • Use a laser cutter to create intricate designs on the clock face.
  • Get creative with the clock hands! Use pieces of driftwood, metal, or even fabric scraps for a unique touch.
  • Don't be afraid to experiment with different finishes. Try using a combination of wax, stain, and varnish for a multi-dimensional effect.

Remember, the best part of crafting is the journey, not just the end product. Embrace the process, enjoy the creativity, and most importantly, have fun!

Read more

How to Make a Durable Squirrel Den Box

0

How to Make a Durable Squirrel Den Box

Building a Durable Squirrel Den Box: A Guide for Wildlife Lovers

Squirrels are fascinating creatures that bring joy and a touch of wilderness to our backyards. Providing them with a safe and comfortable den box can be a rewarding experience, allowing you to observe their charming antics up close. This comprehensive guide will equip you with the knowledge and steps necessary to build a durable squirrel den box that will stand the test of time and provide a welcoming haven for your furry friends.

Choosing the Right Materials

The foundation of a sturdy squirrel den box lies in selecting high-quality materials that will withstand the elements and provide a secure shelter. Here are some key considerations:

Wood

Opt for naturally decay-resistant wood types like cedar, redwood, or pressure-treated pine. These woods possess natural oils and preservatives that repel moisture and insects, ensuring longevity for your den box. Avoid using treated lumber as it can release harmful chemicals.

Fasteners

Utilize galvanized screws or stainless steel nails to secure the wood components. These materials resist rust and corrosion, preventing the den box from weakening over time.

Roofing Material

A durable roof is crucial to protect the den box from rain and snow. Consider using metal roofing shingles, asphalt shingles, or even a layer of heavy-duty plastic sheeting for a waterproof barrier.

Designing a Practical and Safe Den Box

A well-designed den box will offer squirrels the necessary space, security, and comfort. Keep the following design elements in mind:

Dimensions

Aim for a den box with internal dimensions of at least 10 inches wide by 10 inches deep and 12 inches high. This allows ample room for squirrels to move freely and curl up comfortably. Consider adding a small platform inside for a cozy resting spot.

Entry Hole

Position the entry hole on one of the side panels, approximately 3 inches above the floor. Use a drill bit to create a smooth, circular opening with a diameter of 2.5 inches. This allows squirrels to easily access the den while deterring larger predators.

Ventilation

Proper ventilation is essential to prevent moisture build-up and ensure a healthy environment for squirrels. Include ventilation holes on the back or top of the den box, using a drill bit to create small, well-placed openings.

Building the Squirrel Den Box

Now that you have the materials and design in place, you can assemble the den box following these steps:

  1. Cut the Wood: Using a saw, cut the wood according to the dimensions outlined in your design. Be precise and ensure the cuts are square.
  2. Assemble the Base: Attach the four side panels to the bottom panel using galvanized screws or stainless steel nails. Make sure the seams are tight and secure.
  3. Attach the Back Panel: Secure the back panel to the base, creating a complete enclosure.
  4. Install the Roof: Cut the roofing material to size and attach it to the top of the den box using screws or nails. Ensure the roof is securely fastened to prevent leaks.
  5. Create the Entry Hole: Drill the entry hole on one of the side panels, ensuring it is positioned correctly and smooth.
  6. Add Ventilation: Drill small ventilation holes on the back or top of the den box.
  7. Finish Touches: If desired, you can add finishing touches to the den box, such as painting it with a weather-resistant paint. Choose a neutral color to blend in with the surrounding environment.

Installing the Den Box

Once the den box is complete, find a suitable location for installation. Keep these factors in mind:

  • Height: Mount the den box at least 8 feet above ground to protect squirrels from predators.
  • Placement: Choose a location that provides shade from direct sunlight, especially during the summer months.
  • Security: Install the den box securely to a sturdy tree or post.

Providing a Welcoming Habitat

To attract squirrels to your den box, create a welcoming habitat for them by:

  • Planting native trees and shrubs: These provide squirrels with food sources and shelter.
  • Offering supplemental food: During winter months, squirrels may benefit from additional food sources such as nuts, seeds, or suet.
  • Providing water: Place a shallow bird bath or bowl with fresh water near the den box.

By building a durable and welcoming squirrel den box, you can provide a safe haven for these delightful creatures, enriching your backyard with their playful antics and contributing to the local ecosystem.

Read more

DIY Cold Frame for Spring Planting Success

0

DIY Cold Frame for Spring Planting Success

DIY Cold Frame for Spring Planting Success: A Gardener's Guide

Hey there, fellow green thumbs! As the days start to lengthen and the sun feels a little warmer, the urge to get our hands dirty and start planting awakens within us. But spring can be a fickle mistress, and those precious seedlings are vulnerable to late frosts and chilly nights. Fear not, my friends! Today, we're diving into the world of cold frames â€" the ultimate secret weapon for giving your spring plantings a head start and protecting them from the elements.

A cold frame is basically a mini-greenhouse, allowing you to create a microclimate that's warmer than the surrounding air. Think of it as a cozy little haven for your seedlings, shielding them from the chill and giving them a chance to thrive before you transplant them into the garden.

Why Build a Cold Frame?

Building a cold frame is easier than you think, and the benefits are plentiful:

  • Extend Your Growing Season: Cold frames allow you to start your seeds earlier in the spring and even continue growing into the fall.
  • Protect Tender Seedlings: They create a buffer against late frosts, strong winds, and harsh weather conditions.
  • Boost Seedling Growth: The warm, sheltered environment promotes faster and healthier growth.
  • Save Money: Building a cold frame is a cost-effective alternative to purchasing expensive starting trays or greenhouse space.
  • Boost Your Gardening Skills: It's a fun and rewarding project that will make you a more skilled and confident gardener.

DIY Cold Frame: What You'll Need

Don't worry, you don't need a degree in carpentry to build a cold frame. With a few simple materials and a bit of know-how, you can create a sturdy and functional haven for your seedlings.

Materials:

  • Frame:
    • Wood: Use sturdy, rot-resistant lumber like cedar, redwood, or pressure-treated wood. Consider using 2x4s or 2x6s for the frame.
    • PVC Pipe: This is a great lightweight option, especially for larger cold frames. You can find pre-cut pieces at most hardware stores.
    • Metal: You can use metal conduit or fencing for a more durable frame, but it's generally more challenging to work with.
  • Glazing:
    • Glass: It offers excellent light transmission, but can be heavy and breakable.
    • Plexiglass: Stronger and lighter than glass, but it can scratch easily.
    • Polycarbonate: This is a durable and lightweight option with excellent insulating properties, but it can be more expensive.
  • Hardware:
    • Screws or Nails: Use screws or nails that are long enough to securely fasten the frame and glazing materials.
    • Hinges: For a hinged lid that opens and closes easily.
    • Latch: To keep the lid closed and secure.
  • Other:
    • Measuring Tape
    • Saw or Circular Saw
    • Drill
    • Level
    • Safety Glasses
    • Work Gloves

Choosing the Perfect Location

Finding the right spot for your cold frame is crucial. It needs to be:

  • Sunny: At least 6 hours of sunlight a day is ideal for promoting growth.
  • Well-Drained: Avoid areas that are prone to standing water, which can damage your seedlings.
  • Protected: Find a spot sheltered from strong winds, especially during the winter.
  • Accessible: Make sure you can easily reach the cold frame for planting, watering, and maintenance.

Building Your Cold Frame: Step-by-Step Guide

Ready to bring your cold frame dream to life? Let's break down the process into easy steps:

Step 1: Determine the Size

The size of your cold frame will depend on your needs and available space. Consider how many seedlings you want to grow and how much room you have in your garden.

Step 2: Build the Frame

Cut the lumber or PVC pipe to the desired size using a saw. Assemble the frame using screws or nails, ensuring that the corners are square and the sides are straight. You can use a level to check for plumbness.

Step 3: Prepare the Base

The base of your cold frame should be level. If necessary, you can build a wooden base or use bricks to level the frame. It's also a good idea to create a small drainage channel along the bottom of the frame to prevent excess water from accumulating.

Step 4: Attach the Glazing

Carefully cut the glazing material to fit the frame using a utility knife or a glass cutter. Attach the glazing using screws, nails, or special glazing clips, making sure it's secure and watertight.

Step 5: Install the Hinges and Latch

Attach hinges to the lid of the cold frame. If you are using a hinged lid, make sure it opens and closes smoothly. Secure a latch to the lid so it can be kept closed when needed.

Step 6: Finishing Touches

Once the cold frame is assembled, give it a final check for any loose pieces or gaps that could let in cold air. You can apply a sealant around the edges to make the frame even more weatherproof. You may also want to paint your cold frame to match your garden or to protect the wood from the elements.

Caring for Your Cold Frame

Now that you have your cold frame built, let's make sure your precious seedlings thrive:

  • Watering: Check the soil moisture regularly and water as needed. Avoid overwatering, which can lead to root rot.
  • Ventilation: Open the lid on warm days to allow for air circulation and to prevent overheating. Close it at night or during cold weather to keep the seedlings warm.
  • Sunlight: Ensure that your cold frame receives adequate sunlight, especially during the early stages of growth.
  • Protection: Keep an eye on the weather and be ready to take steps to protect your seedlings from harsh conditions like heavy rain or strong winds.
  • Maintenance: Clean the glazing regularly to prevent dirt and debris from blocking sunlight. Check the frame for any loose screws or nails and repair them as needed.

Tips for Success

Here are a few extra tips to maximize your cold frame success:

  • Use a good quality seed-starting mix: This will provide the ideal growing conditions for your seedlings.
  • Thin your seedlings: As they grow, you may need to thin them out to give each plant enough space to develop.
  • Harden off your seedlings: Before you transplant them outside, gradually acclimate them to the outdoor environment by exposing them to increasing amounts of sunlight and wind over a few days.
  • Get creative with your cold frame: There's no one-size-fits-all approach to cold frame gardening. Experiment with different materials and designs to find what works best for you and your garden.

And there you have it! Building a cold frame is a fun and rewarding project that will help you get a jump start on your spring gardening. Now get out there, grab those tools, and start building your own little greenhouse haven!

Read more

BeginnerÂ’s Guide to Squirrel Den Boxes

0

Beginner’s Guide to Squirrel Den Boxes

Beginner's Guide to Squirrel Den Boxes: Providing Shelter for Your Backyard Friends

Squirrel den boxes, also known as squirrel nesting boxes, offer a safe and comfortable haven for these energetic and curious creatures. Providing a den box in your backyard can attract squirrels, enrich your local ecosystem, and offer you a delightful opportunity to observe their antics. This guide will walk you through everything you need to know about building and installing a squirrel den box, ensuring a welcoming and secure space for your furry friends.

Why Build a Squirrel Den Box?

Squirrel den boxes provide several benefits, both for the squirrels themselves and for the environment:

  • Safe Shelter: Den boxes protect squirrels from predators, harsh weather, and the elements.
  • Nesting and Raising Young: They provide a secure place for squirrels to raise their young, ensuring their survival.
  • Enhancing Biodiversity: By attracting squirrels, you contribute to the local ecosystem, as they play a role in seed dispersal and other ecological processes.
  • Observational Delight: Den boxes offer a unique opportunity to observe squirrels in their natural habitat, providing entertainment and educational value.

Choosing the Right Location and Material

Location Matters

The location of your den box is crucial for attracting squirrels and ensuring its safety. Consider these factors:

  • Height: Place the box at least 10 feet off the ground, keeping it out of reach of predators like cats and raccoons.
  • Tree Selection: Choose a sturdy tree with a diameter of at least 12 inches. Look for trees with branches that can support the weight of the den box.
  • Exposure: Select a spot that offers some shade and protection from direct sunlight and rain.
  • Proximity to Food Sources: Place the box near a source of food, such as trees with nuts or a bird feeder.

Material Selection

Squirrel den boxes are typically made of weather-resistant materials that can withstand the elements:

  • Wood: Cedar, pine, or redwood are popular choices due to their durability and natural resistance to rot and decay.
  • Metal: Aluminum or galvanized steel can also be used, offering superior durability and longevity.
  • Plastic: While less common, plastic boxes are readily available and offer affordability and ease of cleaning.

Building Your Own Den Box

Building a squirrel den box is a rewarding DIY project that allows you to customize the design and size to your liking. Here’s a general guide:

Dimensions and Design

The typical dimensions for a squirrel den box are:

  • Height: 12-18 inches
  • Width: 12-16 inches
  • Depth: 10-12 inches

The box should have a single entrance hole, typically 4-6 inches in diameter, located on one of the side walls. The entrance should be placed higher than the floor to prevent rainwater from entering the box. You can also add a roof overhang to protect the entrance from rain.

Construction Steps

Follow these steps to construct your den box:

  1. Cut and assemble the walls.
  2. Attach the floor.
  3. Create the roof.
  4. Cut the entrance hole.
  5. Add a roosting perch.
  6. Apply a protective finish. A clear sealant or stain can help protect the wood from the elements.

Installing Your Squirrel Den Box

Once you have built your den box, it’s time to install it in your chosen location. Follow these steps:

  1. Select a tree. Choose a sturdy tree with a diameter of at least 12 inches.
  2. Secure the box. Use heavy-duty screws or bolts to attach the box to the tree. Make sure the box is securely fastened to prevent it from falling.
  3. Check for stability. Ensure the box is stable and won’t sway in the wind.

Caring for Your Squirrel Den Box

To ensure your den box remains a welcoming home for squirrels, you should care for it periodically:

  • Clean it regularly. Once a year, remove any accumulated debris or nesting material to prevent pests and diseases.
  • Repair any damage. Check the box for signs of wear and tear and repair any damage promptly.
  • Monitor its use. Keep an eye on the den box to see if squirrels are using it. You may need to adjust the location or design if it’s not being utilized.

Building and installing a squirrel den box is a rewarding way to provide a safe haven for these fascinating creatures. With proper care and maintenance, your den box will provide years of enjoyment for both the squirrels and yourself. Remember to always observe squirrels from a safe distance and respect their privacy.

Read more

How to build a custom wood desk for dual monitors

0

How to build a custom wood desk for dual monitors

Crafting a Custom Wood Desk for Dual Monitors

A well-designed desk can significantly enhance your workspace productivity and comfort. A dual monitor setup, in particular, demands a desk that accommodates both screens comfortably and offers ample space for other essentials. This guide will walk you through the process of building a custom wood desk tailored to your dual monitor needs.

Planning and Design

The first step in constructing a custom desk is meticulous planning and design. This phase lays the foundation for a successful project and ensures that the final product meets your specific requirements.

Defining Your Needs and Requirements

Start by carefully assessing your workspace needs and preferences. Consider the following:

  • Monitor Size: Determine the dimensions of your monitors. This will dictate the width of the desk's monitor shelf.
  • Desk Size: Decide on the overall dimensions of the desk. Factor in the space required for monitors, keyboard, mouse, and other equipment.
  • Storage Needs: Do you require drawers, shelves, or other storage solutions? Consider the type and amount of storage you need.
  • Height: Choose a comfortable working height. This typically falls between 28-30 inches.
  • Materials: Select your desired wood species. Consider factors like durability, aesthetics, and budget.
  • Style: Determine the overall style of the desk. Modern, traditional, or industrial are just a few options.

Sketching a Design

Once you have a clear understanding of your needs, it's time to sketch a design. A simple hand-drawn sketch or a digital design program can help visualize the desk's layout, dimensions, and features. Consider the following elements:

  • Monitor Shelf: Draw the shelf that will support your monitors. Ensure it's wide enough and has enough depth for stability.
  • Work Surface: Design the main work surface, taking into account keyboard space, mouse movement, and any other equipment.
  • Legs: Decide on the design and construction of the desk legs. Consider options like straight legs, angled legs, or a pedestal base.
  • Storage: Include any drawers, shelves, or other storage components in your design.

Materials and Tools

Gathering the necessary materials and tools is crucial for a smooth construction process. This section outlines essential supplies for building a custom wood desk.

Wood Selection

Choose a wood species that aligns with your aesthetic preferences and functional requirements. Popular options for desks include:

  • Maple: Known for its strength, durability, and beautiful grain pattern.
  • Cherry: Possesses a rich, reddish-brown color that deepens with age. It's also durable and work well for desk construction.
  • Walnut: Features a striking grain pattern and a warm, chocolatey color.
  • Oak: A classic choice with a strong, durable, and attractive grain pattern.
  • Pine: More affordable than other options, pine is softer and may require more care.

Consider the size of the boards and their intended use when selecting wood. For the desk top, you'll likely need wider boards. Use thinner stock for shelves and drawers. Also factor in the cost of wood. Prices can vary considerably depending on the species and availability.

Hardware and Supplies

In addition to wood, you'll need various hardware and supplies for construction:

  • Wood Screws: Select screws that are appropriate for the wood species and the thickness of the boards.
  • Wood Glue: Use a high-quality wood glue to ensure strong, lasting joints.
  • Finishing Supplies: Choose a wood finish that complements your chosen wood species. This may include stain, paint, or sealant.
  • Sandpaper: Assorted grits of sandpaper are essential for smoothing surfaces and preparing them for finishing.
  • Measuring Tape and Pencil: These are indispensable for precise measurements and marking cuts.
  • Clamps: Various types of clamps are needed to secure pieces during assembly.
  • Saw: A circular saw, table saw, or hand saw is essential for cutting wood.
  • Drill: A cordless drill with various drill bits is necessary for creating pilot holes and driving screws.
  • Router: A router can be used to create decorative edges or smooth out joints.
  • Safety Gear: Always wear safety glasses, hearing protection, and gloves while working with wood.

Construction Process

With your materials gathered and your design finalized, you can begin the construction process. This section outlines the steps for assembling your custom desk. Always prioritize safety, wear appropriate safety gear, and take your time. Accuracy and attention to detail will result in a well-built and durable desk.

Cutting the Wood

Based on your design, carefully cut the wood for the desk top, monitor shelf, legs, and any storage components. Use a saw that is suitable for the type of wood you are cutting and make sure to measure twice and cut once to avoid mistakes.

Assembling the Desk Frame

Start by assembling the desk frame. This usually consists of the top, bottom, and sides. Use wood glue and screws to join the pieces. Apply a thin bead of glue to the joints and then clamp the pieces together while the glue dries. Allow adequate drying time before proceeding.

Creating the Monitor Shelf

Cut the wood for the monitor shelf to the desired width and depth. You may want to add a lip to the front edge to prevent monitors from slipping. Attach the shelf to the desk frame, ensuring it is securely supported. You may want to use support brackets underneath the shelf if it is very wide.

Installing the Legs

Attach the legs to the desk frame using wood glue and screws. If you are using a pedestal base, attach it to the center of the desk frame. Make sure the legs are level and stable before proceeding.

Adding Storage

If your design includes drawers or shelves, construct these components and install them into the desk. Use drawer slides for smooth operation of drawers. Attach shelves to the sides of the desk frame using brackets or supports.

Sanding and Finishing

Once the desk is fully assembled, sand the entire surface. Use progressively finer grits of sandpaper to achieve a smooth finish. Sand in the direction of the grain to avoid scratches. After sanding, clean the surface thoroughly to remove dust and debris. Apply your chosen wood finish, whether it is stain, paint, or sealant. Follow the manufacturer's instructions carefully to ensure proper application and drying time.

Final Touches and Customization

With the desk fully assembled and finished, it's time to add the final touches and personalize it to your liking. Here are a few ideas for customizing your desk:

  • Cable Management: Consider adding cable management features like grommets, wire channels, or a dedicated cable tray to keep your workspace organized.
  • Under Desk Lighting: Install LED lights underneath the desk for a more comfortable and aesthetically pleasing workspace.
  • Accessories: Add accessories like monitor arms, a keyboard tray, or a cup holder to enhance your workspace.
  • Personalization: Add a personal touch with custom engravings, painted details, or decorative elements.

Conclusion

Building a custom wood desk for dual monitors is a rewarding project that allows you to create a workspace perfectly tailored to your needs. By following these steps and taking your time, you can construct a durable and functional desk that will enhance your productivity and add style to your home office or workspace.

Remember that building a desk is a process that involves planning, precision, and attention to detail. Don't hesitate to seek guidance and advice from experienced woodworkers or consult online resources. With patience and dedication, you can create a custom desk that you'll enjoy for years to come.

Read more

Create a rustic wooden wall clock: step-by-step guide

0

Create a rustic wooden wall clock: step-by-step guide

Crafting a Rustic Wooden Wall Clock: A Step-by-Step Guide

Embrace the charm of rustic decor with a handcrafted wooden wall clock. This DIY project combines the warmth of wood with the functionality of timekeeping, creating a unique statement piece for your home. Let's dive into the process, step by step, and bring your vision to life.

Gathering Your Supplies

Before embarking on your crafting journey, ensure you have all the necessary tools and materials readily available. This will make the process smooth and enjoyable. You'll need:

  • A circular piece of wood (diameter depends on your desired clock size)
  • Clock movement kit (includes hands, mechanism, and mounting hardware)
  • Wood stain or paint (optional, for added color and finish)
  • Sandpaper (various grits)
  • Wood glue
  • Clear sealant (optional, to protect the wood)
  • Drill and drill bits
  • Measuring tape and pencil
  • Safety glasses and gloves

Preparing the Wooden Base

Start by giving your wooden base a good sanding. Begin with a coarser grit sandpaper to remove any rough edges or imperfections, then progress to finer grits for a smoother finish. This step ensures a clean surface for the stain or paint, enhancing the overall look.

Applying Stain or Paint (Optional)

If you wish to add a touch of color or enhance the wood's natural grain, apply your chosen wood stain or paint. Follow the manufacturer's instructions for application and drying time. A light sanding after the stain or paint dries can help achieve a more even finish.

Installing the Clock Movement

Now, it's time to install the clock movement kit. Center the kit on the back of the wooden base and use a pencil to mark the position of the mounting holes. Drill pilot holes slightly smaller than the screws provided in the kit. Secure the movement kit using the provided screws.

Attaching the Clock Hands

Carefully attach the clock hands to the movement shaft according to the manufacturer's instructions. Ensure the hands are aligned correctly with the hour and minute markings on the clock face.

Creating a Rustic Clock Face

Get creative with your clock face design. Here are a few ideas:

  • Roman numerals: Use stencils or a steady hand to paint Roman numerals around the clock face. This classic style adds a timeless touch.
  • Rustic numbers: Paint simple numbers in a rustic font for a farmhouse aesthetic. Consider using a contrasting color for a bold statement.
  • Natural elements: Incorporate twigs, dried flowers, or small pebbles for a truly organic feel. Attach them securely using wood glue.
  • Leave it bare: Embrace the natural beauty of the wood by leaving the clock face unadorned. This option highlights the wood's grain and texture.

Adding a Finishing Touch

To protect your rustic wooden clock from dust, moisture, and wear, apply a clear sealant. A polyurethane or varnish will add a layer of protection and enhance the wood's natural beauty. Allow the sealant to dry thoroughly before hanging your clock.

Hanging Your Rustic Clock

The final step is to hang your handcrafted masterpiece. Use a hammer and nail or a screw to secure a hanging mechanism on the back of the clock. Choose a location in your home where the clock will be prominently displayed and enjoyed.

Congratulations! You've successfully crafted a rustic wooden wall clock that adds warmth and character to your space. Enjoy the fruits of your labor and cherish this unique piece of home décor.

Read more

How to design a custom in-wall gun cabinet for your firearms

0

How to design a custom in-wall gun cabinet for your firearms

Designing a Custom In-Wall Gun Cabinet: Securing Your Firearms with Style

For gun owners who value both safety and aesthetics, a custom in-wall gun cabinet presents the perfect solution. This discreet and secure storage option seamlessly integrates into your home's décor while providing top-notch protection for your valuable firearms. In this guide, we'll walk you through the essential steps involved in designing and building your own custom in-wall gun cabinet.

1. Planning Your In-Wall Gun Cabinet

Before embarking on your project, careful planning is paramount. Take the following steps to ensure your cabinet meets your specific needs and fits flawlessly into your chosen location.

1.1 Determine Location and Dimensions

Select the perfect spot for your in-wall gun cabinet. Consider factors such as accessibility, proximity to electrical outlets, and the overall layout of the room. Measure the available space accurately to determine the cabinet's dimensions. Keep in mind the size and number of firearms you need to store.

1.2 Choose Cabinet Material and Finish

The cabinet material and finish should blend seamlessly with your home's décor. Consider options like:

  • Drywall-matching material: Offers a flush and integrated look.
  • Wood: Creates a classic and elegant touch.
  • Metal: Provides exceptional durability and security.
Choose a finish that complements your existing furnishings and creates a cohesive aesthetic.

1.3 Select Security Features

Security is paramount for any gun cabinet. Include robust features like:

  • Heavy-duty hinges and locking mechanisms: Ensure resistance against forced entry.
  • Interior compartments and shelves: Organize and secure various firearms and accessories.
  • Motion sensors and alarms: Enhance security and deter potential intruders.
Remember to comply with all local firearm safety regulations and obtain necessary permits.

2. Construction and Installation

With your plan in place, it's time to construct and install your custom in-wall gun cabinet. This step may require professional assistance, especially if you're unfamiliar with construction techniques.

2.1 Frame and Build the Cabinet

Using your chosen material, carefully construct the frame and interior compartments of the cabinet. Ensure all joints are strong and secure. If you're working with drywall, be sure to use metal studs for added strength and stability.

2.2 Install Locking Mechanisms

Install high-quality locking mechanisms, ensuring they are securely fastened and tamper-proof. Consider using multiple locking points for enhanced security.

2.3 Install the Cabinet into the Wall

With the cabinet fully assembled, carefully install it into the wall. Ensure it sits flush and secure. You may need to adjust the framing or trim to achieve a seamless finish.

3. Finishing Touches

Once the cabinet is installed, it's time to add the final touches that will make it truly stand out.

3.1 Paint or Stain

Apply a coat of paint or stain to match the surrounding wall or create a contrasting look. Ensure the finish is smooth and even, creating a polished and professional appearance.

3.2 Add Decorative Elements

Consider adding decorative elements like moldings, trim, or custom hardware to enhance the cabinet's aesthetic appeal. These additions can complement the overall design and create a visually pleasing focal point.

Conclusion

Building a custom in-wall gun cabinet is a project that combines practicality with style. By following these steps, you can create a secure and discreet storage solution for your firearms, seamlessly integrating them into your home's décor while maintaining a sense of peace of mind.

Read more

How to build a custom grill gazebo with adjustable features

0

How to build a custom grill gazebo with adjustable features

Building a Custom Grill Gazebo with Adjustable Features

Imagine this: you're hosting a backyard barbecue, the sun is shining, and you're grilling up a storm. But then, the afternoon sun starts to beat down, or a sudden breeze picks up. Wouldn't it be amazing to have a custom-built gazebo that adjusts to the weather, providing shade and protection while enhancing your outdoor cooking experience? This article will guide you through building a grill gazebo with adjustable features, so you can enjoy your grilling adventures in comfort and style.

Planning Your Grill Gazebo

Before you start building, it's crucial to plan your gazebo. This includes determining the size, materials, and features you want. Consider the following aspects:

Size and Shape

Measure your grill and the surrounding space to determine the optimal size for your gazebo. You'll want enough room for comfortable movement and storage of grilling equipment. Popular shapes for gazebos include square, rectangular, and octagonal.

Materials

Choose durable materials that can withstand the elements. Popular options include:

  • Aluminum: Lightweight, corrosion-resistant, and easy to work with.
  • Wood: Adds a classic and natural look, but requires regular maintenance.
  • Steel: Strong and durable, but can be prone to rust.

Adjustable Features

To make your gazebo truly adaptable, incorporate adjustable elements. Here are some ideas:

  • Retractable Roof: A retractable roof made of canvas or waterproof material allows you to adjust the amount of sunlight and protection from rain.
  • Adjustable Side Panels: Consider using retractable side panels or zippered curtains to create a more enclosed space, providing privacy or blocking wind.
  • Height Adjustment: If you have a tall grill, consider building the gazebo with adjustable height options to accommodate its size.

Constructing the Framework

Once you've finalized your design, start constructing the framework. The following steps are a general guide:

  1. Prepare the Base: Clear the area where your gazebo will be built. You can use concrete footings, a wooden deck, or even patio stones for a sturdy base.
  2. Erect the Posts: Install the vertical posts for the gazebo, ensuring they are plumb and secured to the base.
  3. Attach the Beams: Connect the horizontal beams to the posts using strong brackets or connectors. Make sure these are secured for stability.
  4. Install the Roof Supports: If your design calls for a roof, install the necessary supports to create a frame for it.

Installing the Roof and Walls

Now it's time to add the roof and walls to your gazebo:

  1. Choose Roofing Material: Select a durable and weather-resistant roofing material, such as metal, asphalt shingles, or waterproof fabric.
  2. Install the Roofing: Attach the roofing material to the roof frame, ensuring it overlaps properly for waterproofing.
  3. Add the Side Panels: If you opted for adjustable side panels, install them on tracks or use a simple system that allows for easy opening and closing.

Final Touches

Once the structural components are in place, it's time to add the final touches:

  1. Lighting: Install lighting fixtures to create a warm and inviting atmosphere for evening grilling.
  2. Electrical Outlets: Consider incorporating electrical outlets for convenience while grilling.
  3. Storage: Build shelves or cabinets within the gazebo to store grilling tools and accessories.
  4. Finishing: Apply a sealant or paint to the wood or metal components to protect them from the elements.

Building a custom grill gazebo with adjustable features is a great way to enhance your outdoor space. Remember to plan carefully, choose quality materials, and follow safe construction practices. With dedication and a touch of creativity, you can create a welcoming and functional space for enjoying the art of grilling in any weather!

Read more

How to Make a Birdhouse with a Pitched Roof for Improved Drainage

0

How to Make a Birdhouse with a Pitched Roof for Improved Drainage

Building a Birdhouse with a Pitched Roof for Excellent Drainage

A birdhouse is a delightful addition to any backyard, attracting feathered friends and adding a touch of charm. But a well-designed birdhouse goes beyond mere aesthetics, offering practical features for the birds that call it home. One essential element is a pitched roof, ensuring proper drainage and protecting the nestlings from rain and snow. Let's embark on a journey to create a charming and functional birdhouse with a pitched roof.

Materials Needed for Your Birdhouse Project

Before you dive into building, gather these materials:

  • Wooden board (1x6 or 1x8) for the base, sides, and roof
  • Wooden dowel (1/2-inch diameter) for the perch
  • Wood glue
  • Wood screws (1 1/4-inch)
  • Hammer
  • Saw (hand saw or circular saw)
  • Drill
  • Measuring tape
  • Pencil
  • Sandpaper
  • Paint or stain (optional)

Steps to Construct Your Birdhouse

1. Cut the Base and Sides

Using your saw, cut the wooden board to create the base and four sides of the birdhouse. The base should be square, with dimensions that suit your desired birdhouse size. The sides should be rectangular, with a height that accommodates the birds you want to attract. Remember to cut a square opening on one of the sides for the birdhouse entrance.

2. Assemble the Base and Sides

With your base and sides cut, attach the sides to the base using wood glue and screws. Make sure the sides are positioned securely and that the entrance opening faces the desired direction. Let the glue dry thoroughly.

3. Create the Pitched Roof

The pitched roof is the key to proper drainage. Cut two triangular pieces of wood for the roof, making them slightly wider than the base of the birdhouse. Angle the roof pieces so they meet at a peak, creating a slope for water to run off.

4. Attach the Roof

Secure the roof pieces to the top of the birdhouse using wood glue and screws. Ensure the roof is well-attached and forms a tight seal against the sides.

5. Add the Perch

To make your birdhouse welcoming, cut a piece of the wooden dowel to serve as a perch. Drill a small hole near the entrance opening and insert the perch, ensuring it is secure and protrudes slightly for easy access.

6. Sand and Finish

Sand all surfaces of the birdhouse to create a smooth finish and prevent splinters. If you wish, paint or stain the birdhouse for a decorative touch and to protect the wood from weathering.

Placement and Maintenance

Once your birdhouse is complete, choose a suitable location. Hang it securely to a tree or post, out of direct sunlight and away from predators. Remember to clean and inspect the birdhouse regularly, removing debris and old nesting materials.

Read more

 
Powered by Blogger