Build Your Own Furniture Dolly with These Simple DIY Plans

0

Build Your Own Furniture Dolly with These Simple DIY Plans

Moving heavy furniture can be a back-breaking task, but it doesn't have to be! With a little ingenuity and some readily available materials, you can easily construct a sturdy and reliable furniture dolly that will make your next move a breeze. Forget expensive store-bought options – this DIY project empowers you to build a customized dolly perfectly suited to your needs, all while saving you money.

Gathering Your Supplies: A Simple Shopping List

Before you begin, gather all your materials. This project prioritizes simplicity and affordability. You'll find most items at your local hardware store. Don't worry about needing specialized tools; basic carpentry skills will suffice.

Essential Materials:

  • Two 2x4s (4 feet long): These form the base of your dolly.
  • One 2x4 (2 feet long): This serves as a cross-brace for added strength and stability.
  • Four heavy-duty casters (3-inch or larger): These are the wheels that will make your dolly roll smoothly. Opt for swivel casters for better maneuverability.
  • Wood screws (2 1/2-inch): Use enough to securely fasten all components.
  • Wood glue (optional): Adds extra strength to the joints.
  • Sandpaper (optional): Smooths any rough edges for a polished finish.

Construction: Building Your DIY Furniture Dolly

This project is straightforward and can be completed in under an hour. Follow these steps for a sturdy, functional dolly. Remember safety first; always wear safety glasses when using power tools.

Step 1: Preparing the Base

Lay the two 4-foot 2x4s parallel to each other on a flat surface, ensuring they are spaced evenly. This spacing will determine the width of your dolly; consider the size of the furniture you'll be moving. Measure carefully!

Step 2: Adding the Cross-Brace

Position the 2-foot 2x4 across the middle of the two longer 2x4s, creating a rectangular frame. Ensure it's centered to distribute weight evenly. Secure the cross-brace using wood screws at each intersection. If using wood glue, apply it before screwing in the wood.

Step 3: Attaching the Casters

Attach the casters to the corners of your frame. Using a drill and appropriate-sized drill bit, create pilot holes in the 2x4s to prevent the wood from splitting when inserting the screws. Securely fasten each caster with the included screws. Check for wobble; adjust the placement if needed.

Step 4: Sanding and Finishing (Optional)

For a smoother, more polished dolly, use sandpaper to gently smooth any rough edges or splinters. You can also consider painting or staining the wood for added durability and aesthetics. Let the finish dry completely before use.

Using Your New Furniture Dolly

Congratulations! You've successfully built your own furniture dolly. Test it out on some lighter items first to ensure it's functioning smoothly. Remember to distribute the weight evenly on the dolly when moving heavier furniture. With your new dolly, moving day just became significantly easier and less strenuous. Enjoy your newly built, money-saving solution!

Read more

Rustic chaise lounge woodworking plans for a natural look

0

Build Your Dream Rustic Chaise Lounge: A Natural Look Woodworking Project

Hey there, fellow woodworkers! So you're thinking of building a rustic chaise lounge? Fantastic choice! There's something incredibly satisfying about creating a beautiful, comfortable piece of furniture entirely with your own two hands. And a rustic chaise lounge, especially one with that gorgeous natural look, is the perfect blend of style and relaxation. Let's dive into making this dream a reality!

Choosing Your Wood: The Heart of Rustic Charm

The key to a truly rustic look is selecting the right wood. Forget those perfectly smooth, factory-finished boards. We’re going for character here! Think reclaimed wood, weathered lumber, or even rough-sawn planks.

Reclaimed Wood: A Story in Every Grain

Reclaimed wood is my personal favorite. It boasts a history, showing off knots, imperfections, and variations in color that just scream "rustic." You can find reclaimed wood at salvage yards, demolition sites (always check for safety!), or even repurpose old barn wood if you’re lucky enough to have access to it. Just be sure to check the wood for any rot or significant damage before you start.

Weathered Lumber: Embrace the Elements

If reclaimed wood isn't readily available, weathered lumber is a great alternative. Look for lumber that’s been exposed to the elements, giving it that naturally grayed and softened appearance. The imperfections are part of the charm! You can even accelerate the weathering process yourself with a little help from nature (more on that later!).

Rough-Sawn Planks: The Untamed Beauty

Rough-sawn planks offer a more raw, unrefined look. They're typically less expensive than reclaimed or weathered wood, but they will need more preparation before you can start building. You'll likely need to plane them down slightly to achieve the smoothness you need for comfort.

Design Considerations: Planning Your Perfect Lounge

Before you jump into cutting wood, let's sketch out your chaise lounge. This is crucial, folks! A well-thought-out plan saves time and frustration down the line.

Dimensions: Comfort is Key

Consider your own height and preferred lounging posture. A typical chaise lounge is around 6-7 feet long, but you can adjust these dimensions to suit your needs. Think about the ideal seat width and backrest angle for ultimate comfort.

Angle of Recline: Find Your Sweet Spot

Experiment with different angles for the backrest. A steeper angle provides more support for sitting up, while a shallower angle is perfect for lounging. You can even create an adjustable backrest for ultimate versatility.

Aesthetics: Rustic Details

Think about the overall aesthetic you want to achieve. Will you incorporate curved lines for a softer look or stick to straight lines for a more modern rustic feel? Do you envision using simple joinery or more decorative elements?

Construction: Bringing Your Vision to Life

Now for the fun part! The construction process can be broken down into several stages.

Cutting the Wood: Precision is Paramount

Carefully measure and cut your wood according to your plan. Use a miter saw for precise cuts, especially for angled pieces. Remember, accuracy is key here to ensure everything fits together smoothly.

Joints and Fasteners: Choosing the Right Approach

For a truly rustic look, consider using traditional joinery techniques like mortise and tenon or dowel joints. These add a unique character to the piece. Alternatively, you can use screws and wood glue for a quicker build. If using screws, choose screws that blend seamlessly with the wood's color and countersink them for a cleaner finish.

Assembling the Frame: Step-by-Step Guidance

Start by assembling the main frame of the chaise lounge. This usually involves connecting the legs, seat supports, and backrest supports. Take your time, ensuring each joint is secure and aligned perfectly. Clamp the pieces together while the glue dries to prevent any shifting.

Adding the Finishing Touches

Once the frame is complete, it’s time to add the seat and backrest. You can use thick planks of wood, or for extra comfort, consider using outdoor fabric stretched over a wooden frame. Secure everything firmly, checking for stability and comfort.

Finishing: Enhancing the Natural Beauty

The final step is to finish your rustic chaise lounge and protect it from the elements.

Sanding: Smooth But Not Too Smooth

Sand the wood carefully, paying attention to the curves and edges. You want a smooth finish that's comfortable to the touch, but don't sand away all the character! Leave some of the texture to maintain that rustic feel.

Finishing Options: Protecting Your Creation

For a natural look, avoid high-gloss finishes. Instead, consider using a natural oil, a penetrating stain, or a clear sealant to protect the wood without obscuring its beauty. A light sanding between coats will ensure a smooth finish. This protects your chaise lounge from sun and water damage, especially if it will be used outdoors.

Adding Your Personal Touch

Don't be afraid to personalize your chaise lounge! Add some rustic details like decorative metal accents, carved elements, or even a custom-made cushion to perfectly match your décor. Let your creativity run wild!

Commonly Asked Questions

Q: What kind of glue should I use?

A: A high-quality exterior wood glue is recommended, particularly if the chaise lounge will be used outdoors. Wood glue is strong and provides a durable bond.

Q: How do I weather wood myself?

A: You can accelerate the weathering process by applying a mixture of water and vinegar to the wood. This helps break down the lignin in the wood, giving it that silvery-gray patina. Remember to test this on a scrap piece of wood first.

Q: Can I use this plan for an indoor chaise lounge?

A: Absolutely! The plan can be easily adapted for indoor use. You could use different wood and a different finish, for example.

Q: How long does the project take?

A: This depends on your experience and the complexity of your design. Expect to spend several weekends working on it.

There you have it! Building a rustic chaise lounge is a rewarding experience. Remember to take your time, enjoy the process, and most importantly, have fun creating your own unique piece of outdoor furniture. Happy building!

Read more

DIY country woodworking designs for classic farmhouse vibes

0

DIY Country Woodworking Designs for Classic Farmhouse Vibes

The enduring appeal of the classic farmhouse aesthetic lies in its blend of rustic charm and functional simplicity. This style, characterized by its use of natural materials, weathered finishes, and straightforward designs, provides a comforting and inviting atmosphere. For those with a penchant for crafting and a desire to imbue their homes with unique, handcrafted pieces, DIY country woodworking offers an unparalleled opportunity to achieve this sought-after aesthetic. This comprehensive guide explores a range of projects, from fundamental techniques to advanced designs, empowering the aspiring woodworker to create stunning farmhouse-style elements for their living spaces.

Fundamental Techniques for the Aspiring Farmhouse Woodworker

Before embarking on ambitious projects, mastering fundamental woodworking techniques is paramount. A solid foundation in these skills will ensure both the structural integrity and aesthetic appeal of your creations. This section outlines essential skills and tools required for success.

Essential Tools and Materials

Investing in quality tools is a worthwhile investment for any woodworker. A basic toolkit should include a measuring tape, a combination square, various chisels, a hand saw (or circular saw), sandpaper in various grits, clamps, wood glue, and a safety mask. The choice of wood is crucial for achieving the desired farmhouse aesthetic. Reclaimed wood, with its inherent imperfections and character, is ideal. Alternatively, new lumber can be treated to achieve a distressed, aged appearance. Popular choices include pine, oak, and cedar, each possessing its unique qualities and aesthetic properties.

Essential Techniques: Cutting, Joining, and Finishing

Accurate cutting is foundational to any woodworking project. Mastering both straight cuts and angled cuts is essential. Precise joinery techniques, such as mortise and tenon, dovetail, or simple butt joints, determine the strength and durability of your projects. Finally, finishing techniques, including sanding, staining, and sealing, significantly influence the final look and longevity of your work. Understanding how different finishes interact with various wood types is critical for achieving the desired weathered or rustic look.

Beginner-Friendly Farmhouse Woodworking Projects

For those new to woodworking, starting with simpler projects allows for skill development and builds confidence before tackling more complex designs. These projects are ideal for honing foundational techniques and experiencing the satisfaction of creating functional and aesthetically pleasing pieces.

Rustic Wooden Shelf

A simple, floating shelf is an excellent entry-level project. This requires basic cutting, sanding, and finishing skills. Utilizing reclaimed wood adds to the farmhouse charm. Consider adding decorative elements like metal brackets for an enhanced aesthetic appeal.

Farmhouse-Style Coat Rack

A coat rack provides a practical and decorative element for an entryway or mudroom. Simple designs can be constructed using readily available lumber and basic joinery techniques. Consider adding a rustic touch with a distressed paint finish or a natural wood stain.

Wooden Serving Tray

A wooden serving tray is a versatile piece that can be used for both practical and decorative purposes. This project requires accurate cutting and precise joining to create a sturdy and visually appealing piece. Consider incorporating handles for ease of use.

Intermediate Farmhouse Woodworking Projects: Elevating Your Skills

As confidence and skill grow, more complex projects can be undertaken. These intermediate projects allow for the exploration of more advanced techniques and the creation of unique, statement pieces for the home.

DIY Farmhouse Coffee Table

A coffee table is a central piece of furniture in many living rooms. Designing and building your own offers immense satisfaction and allows for customization to perfectly complement your home’s décor. This will involve more advanced joinery techniques and potentially the use of different wood species for contrasting aesthetics.

Rustic Wooden Headboard

A handcrafted headboard adds a personalized touch to a bedroom. This project provides an opportunity to experiment with various wood types, finishes, and potentially incorporate decorative elements such as carved details or metal accents. Accurate measurements are crucial for a proper fit.

Custom Built-in Shelves

Built-in shelving offers a practical and stylish solution for maximizing storage space. Careful planning and accurate measurements are crucial for a seamless integration into the existing architecture. This project allows for customization in terms of size, configuration, and finish.

Advanced Farmhouse Woodworking Projects: Mastering the Craft

For experienced woodworkers, ambitious projects allow for the full expression of creativity and the creation of truly unique and impressive pieces. These projects require a mastery of various techniques and a keen eye for detail.

Farmhouse Kitchen Island

A kitchen island is a significant undertaking, requiring expertise in joinery, finishing, and potentially even the incorporation of features such as butcher block countertops or integrated seating. Careful planning, detailed drawings, and precise execution are essential for a successful outcome.

Rustic Farmhouse Dining Table

A dining table is a centerpiece of any dining room. Constructing a farmhouse-style dining table requires advanced woodworking skills, including the creation of complex joinery, the selection and treatment of appropriate lumber, and the application of a durable and aesthetically pleasing finish. This ambitious project showcases the culmination of refined skills.

Custom-Designed Farmhouse Entryway Bench

An entryway bench combines functionality and aesthetic appeal. This project allows for the incorporation of storage, custom dimensions, and unique design elements to perfectly complement the entryway. This advanced project requires careful planning and execution, combining different techniques to achieve a cohesive and functional piece.

Safety Precautions: Woodworking involves inherent risks. Always wear appropriate safety gear, including eye protection, hearing protection, and a dust mask. Ensure proper ventilation when using finishes and adhesives. Follow all safety guidelines provided with your tools and materials. Start with smaller projects to build confidence and skill before tackling more complex designs.

By embarking on these DIY country woodworking projects, you can transform your home into a haven reflecting your personal style and artistic flair. The process itself is rewarding, offering a sense of accomplishment and pride in creating functional and aesthetically pleasing pieces that will last for generations. The classic farmhouse style, with its timeless appeal and rustic charm, provides a perfect canvas for your creative woodworking endeavors.

Read more

Build a crib with slatted sides for airflow and visibility

0

Building a Safe and Stylish Crib with Slatted Sides

Creating a crib for your little one is a deeply personal and rewarding project. This guide walks you through building a safe and stylish crib featuring slatted sides for optimal airflow and visibility. We'll focus on a design that prioritizes safety while allowing you to personalize the aesthetic with your choice of wood and finish. Remember to always prioritize safety and consult local building codes and safety standards before starting your project.

Gathering Your Materials and Tools

Before you begin, meticulously gather all necessary materials. Accurate measurements are crucial for a structurally sound crib. A well-organized workspace will make the process smoother. You'll need various types of lumber, including sturdy hardwood for the frame and thinner, evenly spaced slats for the sides. Consider using a wood known for its durability and resistance to splintering, such as maple or birch. Always check the lumber for knots or imperfections that could compromise structural integrity. Beyond the wood, acquire strong screws, wood glue, a high-quality wood finish (non-toxic and child-safe is paramount!), sandpaper in various grits, and appropriate safety equipment like safety glasses and ear protection. Your tool list should include a saw (circular saw or miter saw for accurate cuts), drill, screwdriver, measuring tape, clamps, and a sander. Don't forget your safety gear!

Constructing the Crib Frame

Begin by cutting the hardwood according to your carefully measured plans. Constructing a strong and stable rectangular frame forms the foundation of your crib. This framework provides the support for the slatted sides and the mattress base. Use wood glue and screws to join the pieces together, ensuring that the corners are perfectly aligned and tightly secured. Remember that the corners are high stress points and must be robust. Use several screws per joint for added strength. Clamping the pieces firmly together while the glue dries is essential to prevent warping or movement. Once the glue has fully cured, carefully inspect each joint for stability.

Adding the Slatted Sides

Precisely cut and shape the slats for the sides. Maintain even spacing between each slat for consistent airflow and an aesthetically pleasing look. Using a jig or template can help ensure perfectly even spacing. Once cut, attach the slats securely to the frame, either using screws or dowels (for a cleaner look). Before permanently attaching them, position all slats for a perfect fit and check for any inconsistencies. For added safety, ensure that the space between the slats meets safety standards to prevent your baby from getting their head or limbs trapped. Once you're satisfied, securely attach the slats. Sand all edges smooth to prevent splinters and any sharp edges.

Finishing Touches and Safety Checks

Once the frame and sides are complete, it's time to finish the crib. Apply a child-safe, non-toxic wood finish. Follow the manufacturer's instructions carefully. Multiple thin coats are preferable to one thick coat, allowing for even coverage and preventing drips or runs. After the finish is completely dry, conduct a thorough inspection. Check for any sharp edges, loose screws, or potential hazards. Ensure the spacing between slats meets safety guidelines, and that the overall construction is sturdy and stable. Never compromise on safety. If you have any doubts, consult a professional.

Adding the Mattress Support and Final Assembly

The final step is adding the mattress support. This could be a simple slatted base or a more substantial plywood platform. Ensure it fits snugly within the crib frame and is securely attached. This will provide a stable base for the mattress. Following a thorough safety check, you can then consider adding a decorative touch such as rounded edges or custom paint detail (if your finish allows). A crib built with love and care will create a special environment for your baby’s early years. Remember to always consult relevant safety standards and consider professional advice if needed.

Disclaimer: This guide provides general instructions. Always prioritize safety and consult relevant building codes and safety standards before starting your project. Improper construction can lead to serious injury. If you lack experience in woodworking, consider seeking professional assistance.

Read more

Custom picnic table designs for your garden

0

Elevate Your Garden with a Custom Picnic Table Design

Transform your outdoor space from ordinary to extraordinary with a custom-designed picnic table. Forget generic, mass-produced options; imagine a table perfectly tailored to your garden's aesthetic and your family's needs. This isn't just about seating; it's about crafting a focal point, a gathering place, a reflection of your personal style. We'll explore the exciting possibilities of bespoke picnic table design, guiding you through the process of creating a truly unique piece for your garden.

Designing Your Dream Picnic Table: Material Matters

The heart of any custom design lies in material selection. Consider the overall ambiance you wish to create. A rustic, charming garden might benefit from a reclaimed wood table, its weathered surface telling a story. The rich tones and natural variations in the wood add undeniable character. For a more modern, sleek aesthetic, opt for durable, weather-resistant composite materials that require minimal maintenance. These often mimic the look of wood but offer superior longevity. Perhaps you envision a sleek metal frame supporting a stained glass tabletop, radiating a touch of whimsy and elegance. The possibilities are vast, limited only by your imagination.

Exploring Material Options:

  • Reclaimed Wood: Offers rustic charm, unique character, and environmental sustainability.
  • Composite Materials: Provide low-maintenance durability and a modern look.
  • Metal: Creates a strong, long-lasting frame, suitable for various table designs.
  • Stone or Concrete: Provides a solid, robust base for a substantial and unique table.

Beyond the Basics: Adding Personal Touches

A truly custom picnic table transcends functionality; it becomes a work of art. Think beyond the standard rectangular design. Consider a circular table for a more intimate gathering, fostering conversation and connection. Incorporate built-in features, such as a built-in cooler, umbrella holder, or even integrated planters to extend the table’s usefulness and aesthetic appeal. Perhaps you envision a mosaic tiled tabletop, a unique inlay, or even hand-painted details. These personalized touches elevate the piece from a simple picnic table to a cherished family heirloom.

Personalization Ideas:

  • Unique Table Shape: Circular, hexagonal, or even freeform designs.
  • Built-in Features: Cooler, umbrella holder, storage compartments, or integrated planters.
  • Decorative Elements: Mosaic tiles, inlays, carving, or hand-painted designs.
  • Custom Seating: Built-in benches, swing seats, or even rocking chairs.

The Collaboration Process: Bringing Your Vision to Life

Designing a custom picnic table is a collaborative journey. Work closely with a skilled craftsman or designer to translate your ideas into a tangible reality. Provide them with inspiration images, discuss your desired materials, and detail your preferred features. This collaborative process ensures that the final product reflects your unique style and meets your specific requirements. Remember to discuss the installation process to ensure a seamless integration into your garden. Don't hesitate to ask questions throughout the process and adjust the design as needed to achieve your perfect outdoor retreat.

Investing in a custom-designed picnic table is an investment in lasting memories. It's a piece that will enhance your garden's beauty, provide a comfortable gathering space for years to come, and become a symbol of your personal style and family connection.

Read more

Free-standing cantilever pergola construction guide

0

Building Your Dream Free-Standing Cantilever Pergola: A Step-by-Step Guide

Hey there, fellow DIY enthusiasts! So you're thinking about building a free-standing cantilever pergola? Awesome choice! These beauties add instant elegance and shade to any backyard, and the best part? You can totally build one yourself, even if you're not a seasoned carpenter. This guide will walk you through the process, step by step, in a way that's hopefully clear, friendly, and easy to follow. Let's get started!

1. Planning and Design: Dream Big, But Plan Smarter

Before you even think about grabbing a saw, let's get the planning sorted. This is the most crucial part â€" skipping this step can lead to headaches (and potentially wasted materials) down the line.

1.1 Defining Your Pergola's Personality

First things first: What kind of vibe are you going for? Rustic charm? Modern minimalism? A touch of Mediterranean flair? Your pergola's style will influence material choices and design details. Think about:
  • Size and shape: How much space do you have? Do you want a square, rectangular, or even a more whimsical shape?
  • Materials: Wood (cedar, redwood, pressure-treated lumber are popular choices), metal (steel or aluminum), or even a combination? Each has its pros and cons regarding cost, maintenance, and aesthetics.
  • Roof style: Solid or slatted roof? The slatted style allows for dappled shade and a bit more airflow. A solid roof might be preferable in areas with heavy rain.
  • Posts and supports: How will your cantilever pergola be supported? This is key for a freestanding design, as we'll discuss later.

1.2 Measurements and Permits

Grab your measuring tape and get precise measurements of your intended location. Consider factors like existing landscaping, pathways, and proximity to your house. Check with your local building department regarding permits â€" you might need one depending on the size and location of your pergola. It's always better to be safe than sorry!

1.3 Sketching Out Your Vision

Even a rough sketch will be helpful. Draw your pergola to scale, noting the dimensions, post placement, and roof structure. This will serve as your blueprint throughout the construction process. Don't be afraid to experiment with different designs until you find one you love.

2. Gathering Your Materials and Tools

Now for the fun part â€" shopping! But before you hit the home improvement store, make sure you have a complete list of materials and tools. This will prevent frustrating trips back and forth. Here's a basic list (remember to adjust quantities based on your pergola's dimensions):
  • Pressure-treated lumber (for posts, beams, rafters, and supports)
  • Fasteners (screws, bolts, nails, etc.)
  • Concrete (for setting the posts)
  • Gravel (for drainage around the posts)
  • Post anchors or sonotubes (for securing the posts in the ground)
  • Wood sealant or stain (for protection against the elements)
  • Level
  • Measuring tape
  • Drill
  • Saw (circular saw, miter saw, or hand saw)
  • Shovel
  • Post hole digger (optional, but highly recommended!)
  • Safety glasses and gloves (crucial for safety!)

3. Constructing the Cantilever Support System: The Heart of the Pergola

The cantilever design is what makes your pergola unique and free-standing. This section is key â€" make sure you understand it well. There are several ways to achieve this; the most common method involves a strong, buried support structure hidden within the ground, connected to the visible posts.

3.1 Digging the Support Holes

Using your post hole digger (or a shovel if you're feeling adventurous!), dig holes deep enough to ensure stability and below the frost line in your region. Consult your local building codes for depth requirements.

3.2 Setting the Hidden Supports

This is where a sturdy base is paramount. You'll typically use large, heavy-duty beams buried horizontally to create your cantilever support. These beams need to be strong enough to support the weight of the pergola. Consider using concrete footings or pier blocks for an extra layer of stability. Securely attach these beams to the base using heavy-duty anchors.

3.3 Installing the Visible Posts

Once the hidden supports are in place, it's time to install your visible posts. These will connect to the buried supports. Use post anchors or sonotubes to ensure the posts are plumb (perfectly vertical) and securely anchored. Backfill the holes with gravel for drainage and then top it off with more concrete to secure the posts.

4. Assembling the Pergola Structure

With the supports firmly in place, let's build the upper structure.

4.1 Attaching the Beams

Attach the horizontal beams to the top of the posts. Make sure they are level and securely fastened.

4.2 Installing the Rafters

Next, install the rafters (the cross-beams that make up your roof). These should be spaced evenly and securely attached to the beams. If you opt for a slatted roof, attach the slats to the rafters.

4.3 Final Touches

Once the main structure is complete, it's time for the final touches. Apply your chosen wood sealant or stain to protect the wood and enhance its appearance. Consider adding additional features like lighting, plants, or a ceiling fan to personalize your pergola.

5. Enjoying Your New Pergola!

Congratulations! You've successfully built your free-standing cantilever pergola. Now sit back, relax, and enjoy the shade and beauty you've created. Remember to regularly inspect your pergola for any signs of damage or wear and tear and perform necessary maintenance as needed.

Frequently Asked Questions (FAQs)

Q: How much does it cost to build a cantilever pergola?

The cost varies greatly depending on the size, materials, and complexity of your design. You can expect to spend anywhere from a few hundred to several thousand dollars.

Q: How long does it take to build a cantilever pergola?

This depends on your experience and the size of the project. A smaller pergola might take a weekend, while a larger, more complex one could take several days or even a week.

Q: Can I build a cantilever pergola myself, or do I need professional help?

While it’s possible to build a cantilever pergola as a DIY project, it's important to assess your skills and comfort level. If you're unsure about any aspect of the construction, it's always best to consult a professional.

Q: What is the best wood to use for a pergola?

Cedar, redwood, and pressure-treated lumber are all popular choices for pergola construction due to their durability and resistance to rot and insects.

Q: How do I ensure my pergola is stable and won't collapse?

Careful planning, proper foundation work (including the hidden supports), and secure fastening are critical for stability. Ensure all connections are strong and the posts are firmly anchored in the ground. Consult a structural engineer if you have any doubts.

I hope this guide has been helpful! Remember to prioritize safety and take your time. Happy building!

Read more

How to Build Lawn Chairs with Foldable or Collapsible Features for Easy Storage

0

How to Build Lawn Chairs with Foldable or Collapsible Features for Easy Storage

Building Foldable Lawn Chairs for Easy Storage

Imagine a sunny afternoon spent relaxing in your backyard, enjoying the warm weather and the company of loved ones. But what if you could pack away those comfortable lawn chairs effortlessly, saving valuable space and making storage a breeze? Building foldable lawn chairs is a rewarding DIY project that allows you to create custom seating solutions for your outdoor space. Not only will you save space, but you'll also have the satisfaction of crafting your own furniture, adding a personal touch to your backyard.

Choosing the Right Materials

The first step in building foldable lawn chairs is selecting the right materials. You'll need durable and weather-resistant options that can withstand the elements and regular use. Here are some popular choices:

  • Wood: Consider using hardwoods like oak, maple, or cherry for a sturdy and classic look. Pine and cedar are also good choices, offering a more rustic aesthetic and natural resistance to rot and insects.
  • Metal: Aluminum or steel are excellent choices for foldable lawn chairs, offering lightweight strength and rust resistance. Consider powder-coating metal frames for added durability and style.
  • Fabric: Choose a fabric that is weather-resistant and easy to clean, such as canvas, vinyl, or polyester. Avoid using fabrics that are prone to fading or shrinking in the sun.

Folding Mechanisms

The folding mechanism is the heart of a foldable lawn chair, ensuring easy storage and portability. You can choose from several popular options:

Hinge-Based Folding

This classic design involves using hinges to connect the chair's legs and back, allowing them to fold flat. You can use standard metal hinges or sturdy wooden hinges depending on your material choice.

Swivel-Based Folding

Swivel-based folding mechanisms allow the seat to rotate and fold down, making the chair more compact. This option often requires a bit more complexity but can create a sleek and modern look.

Latch-Based Folding

Latch-based folding mechanisms use a locking latch to secure the chair in both the open and closed positions. This design is particularly good for ensuring stability and preventing accidental folding.

Building Your Foldable Lawn Chair

Now that you've chosen your materials and folding mechanism, you're ready to start building! Here's a general outline of the construction process:

  1. Cut and Prepare Materials: Carefully measure and cut the wood or metal pieces to the desired dimensions. Sand the wood to create a smooth finish.
  2. Assemble the Frame: Connect the legs and back of the chair using your chosen folding mechanism. Ensure the frame is sturdy and secure.
  3. Attach the Seat: Secure the fabric seat to the frame using staples, screws, or other fasteners. You can choose to use padding for added comfort.
  4. Test and Adjust: Carefully test the chair's folding mechanism to ensure it works smoothly and safely. Make any necessary adjustments to ensure proper fit and function.

Finishing Touches

Once you've completed the construction, you can add some finishing touches to personalize your foldable lawn chairs.

  • Paint or Stain: Apply paint or stain to the wood or metal frame to enhance the look and protect it from the elements.
  • Add Cushions: Add cushions to the seat for added comfort and style.
  • Decorative Elements: Consider adding decorative touches, such as upholstery buttons, fabric trim, or decorative hardware.

Tips for Building Success

Here are some tips to help you build foldable lawn chairs successfully:

  • Plan Ahead: Draw a detailed sketch of your chair design before you start building. This will help you visualize the final product and identify any potential issues.
  • Use High-Quality Materials: Investing in quality materials will ensure your chairs are durable and last for years to come.
  • Take Your Time: Rushing the process can lead to mistakes. Take your time, carefully measuring and cutting the materials.
  • Test and Adjust: Regularly test the folding mechanism throughout the construction process. Make any necessary adjustments to ensure proper fit and function.

Read more

How to Build a Set of Floating Shelves for a Custom Look

0

How to Build a Set of Floating Shelves for a Custom Look

How to Build a Set of Floating Shelves for a Custom Look

Floating shelves are a great way to add storage and style to any room. They're perfect for displaying your favorite books, photos, and decorative items, and they can help to create a more open and airy feel in a space. Plus, they're super easy to build, even if you're a beginner. All you need are a few basic tools and materials, and you can have a set of floating shelves up in no time.

Getting Started

Before you start building your shelves, you'll need to gather your materials and tools. Here's a list of what you'll need:

Materials

  • Wood for the shelves (pine, maple, or oak are good choices)
  • Wood for the brackets (you can use the same type of wood as the shelves, or you can use a different type for a contrasting look)
  • Wood glue
  • Wood screws
  • Finishing nails (optional)
  • Wood filler
  • Sandpaper (different grits)
  • Wood stain or paint (optional)
  • Polyurethane or other sealant (optional)

Tools

  • Tape measure
  • Pencil
  • Miter saw or circular saw
  • Drill
  • Screwdriver
  • Clamps
  • Hammer
  • Level

Choosing Your Wood

The type of wood you choose will affect the look and durability of your shelves. Here are a few popular options:

  • Pine: Pine is a softwood that is easy to work with and affordable. It has a natural grain that gives it a rustic look.
  • Maple: Maple is a hardwood that is known for its durability and beautiful grain pattern. It is a good choice for shelves that will need to support heavy items.
  • Oak: Oak is another hardwood that is strong and durable. It has a rich, warm color that complements a wide range of décor styles.

When choosing your wood, make sure to consider the size and weight of the items you will be storing on the shelves. If you are storing heavy items, you will want to choose a hardwood that is strong enough to support the weight.

Designing Your Shelves

Once you've chosen your wood, it's time to design your shelves. Consider the following factors:

  • Size: How wide and deep do you want your shelves to be? How many shelves do you need?
  • Shape: Do you want your shelves to be straight or curved? Do you want to add any decorative details, like moldings?
  • Placement: Where will you be placing your shelves? Make sure to measure the space to ensure that the shelves will fit properly.

If you're feeling stuck, you can search online for inspiration or look at pre-made floating shelves for ideas. Don't be afraid to experiment and get creative with your design.

Cutting the Wood

Now it's time to cut your wood to size. This is the most important step in the process, so be sure to measure carefully. If you don't have a miter saw or circular saw, you can have the wood cut at your local home improvement store. If you are using a saw, make sure to wear safety glasses and ear protection.

  • Cut the shelf boards: Cut your shelf boards to the desired length and width.
  • Cut the bracket pieces: Cut your bracket pieces to the desired length. You will need two bracket pieces for each shelf.

Assembling the Shelves

Once your wood is cut, it's time to assemble your shelves. Here's how to do it:

  1. Attach the brackets to the wall: Mark the location of your brackets on the wall using a level. Drill pilot holes into the wall at the marked locations and secure the brackets to the wall with screws. Make sure the brackets are level before you attach them.
  2. Attach the shelves to the brackets: Attach the shelves to the brackets using wood glue and screws. Make sure the screws are long enough to go through the shelf and into the bracket.
  3. Finish the shelves: Sand the shelves with sandpaper to smooth out any rough edges. Fill any holes or imperfections with wood filler and sand it down smooth. Apply a stain, paint, or sealant to your shelves if desired.

Adding a Personal Touch

Now that your shelves are built, it's time to add a personal touch! Here are a few ideas:

  • Decorate the brackets: Paint the brackets a different color than the shelves, or add some decorative hardware, like knobs or handles.
  • Add lighting: Install small lights on the bottom of the shelves to highlight your display items.
  • Use wallpaper or fabric: Cover the back of the shelves with wallpaper or fabric to add a pop of color and texture.

Commonly Asked Questions

Here are some common questions people have about building floating shelves:

What kind of screws should I use?

You will need screws that are long enough to go through the shelf and into the bracket, as well as into the wall. The type of screw will depend on the type of wall you are attaching the shelves to. If you have drywall, you will need drywall screws. If you have concrete, you will need concrete screws.

How do I make sure my shelves are level?

Use a level to mark the location of your brackets on the wall. Make sure the brackets are level before you attach them to the wall. When you attach the shelves to the brackets, double-check to make sure they are level.

What is the best way to finish my shelves?

The best way to finish your shelves depends on your personal preference and the style of your home. You can stain the shelves to bring out the natural beauty of the wood, or you can paint them a solid color. You can also add a sealant to protect the finish and make the shelves easier to clean.

Building floating shelves is a fun and rewarding project. You can customize them to fit your space and style, and they're a great way to add storage and personality to your home.

Read more

How to Create Modern Coffee Tables with a Multifunctional Design

0

How to Create Modern Coffee Tables with a Multifunctional Design

Create Modern Coffee Tables with Multifunctional Designs

In the realm of interior design, coffee tables have evolved from mere surfaces for beverages to multifaceted hubs of functionality and style. Modern coffee tables are no longer limited to holding cups and magazines; they embrace a transformative approach, seamlessly integrating storage, display, and even workspaces into their designs.

If you're looking to infuse your living room with a contemporary flair and practicality, creating a modern coffee table with a multifunctional design is a fantastic project. This guide will take you through the steps and considerations needed to bring your vision to life.

Choosing the Right Materials

The foundation of a modern coffee table lies in the materials you select. Consider the aesthetic and practical aspects of each option:

Wood

From sleek walnut to light oak, wood provides warmth, natural beauty, and durability. It's readily available in various finishes, allowing you to create a rustic or polished look.

Metal

Metal, particularly steel or aluminum, lends a clean, industrial edge to your coffee table. It's often combined with other materials like wood or glass for a dynamic contrast.

Glass

Glass offers a minimalist aesthetic and creates a sense of spaciousness. Tempered glass provides strength and durability, making it suitable for everyday use.

Concrete

Concrete adds a raw, industrial element to your design. Its versatility allows for unique shapes and textures, creating a statement piece.

Stone

Natural stone, such as granite or marble, exudes elegance and sophistication. Its durable nature makes it an excellent choice for high-traffic areas.

Planning the Design

Before diving into construction, meticulously plan your coffee table design. Consider the following factors:

Shape and Size

Choose a shape that complements your living room's layout and seating arrangement. Squares and rectangles provide traditional practicality, while circular or oval designs add a touch of whimsy.

Height

The coffee table's height should be comfortable for reaching and interacting with. A standard height is around 18 inches, but adjust it based on your sofa's height and personal preference.

Storage Solutions

Determine your storage needs. Consider incorporating drawers, shelves, or lift-top mechanisms to accommodate books, remotes, or other items.

Display Features

Integrate display elements like open shelving, tiered levels, or built-in lighting to showcase decorative objects or plants.

Workspaces

If desired, incorporate a built-in work surface, such as a laptop stand or a fold-out desk, to create a multi-functional space.

Building and Finishing

Now, it's time to bring your coffee table to life:

Construction

Follow a step-by-step guide for constructing your chosen design. Utilize woodworking techniques like joinery, screws, or adhesives to assemble the frame and incorporate storage elements.

Finishing

Sand the wood surfaces to a smooth finish. Apply a stain or paint to achieve your desired color and sheen. Finish with a protective sealant for durability.

Adding Touches

Add finishing touches like hardware, handles, or decorative accents to enhance the aesthetic and functionality of your coffee table.

Tips for Multifunctionality

Here are some ideas to maximize your coffee table's versatility:

  • Built-in Charging Stations: Incorporate charging ports or wireless charging pads for easy device access.
  • Hidden Compartments: Concealed compartments behind panels or lift-tops provide discreet storage for items you want out of sight.
  • Modular Design: Consider a modular design that allows you to rearrange sections or add extra components as your needs change.
  • Built-in Lighting: Add LED strip lighting underneath the table for a modern and stylish ambiance.
  • Versatile Surfaces: Choose a top surface that's resistant to scratches, heat, and spills for easy cleaning and longevity.
  • Embracing Your Creativity

    Creating a modern coffee table with a multifunctional design is an exciting opportunity to combine practicality with style. Don't be afraid to experiment with materials, shapes, and features to create a unique piece that reflects your personal taste and enhances your living space.

    Read more

    How to Build Stylish Wine Racks for Craft Fairs and Markets

    0

    How to Build Stylish Wine Racks for Craft Fairs and Markets

    Crafting Stylish Wine Racks for Craft Fairs and Markets

    Craft fairs and markets provide an excellent platform to showcase your artistic skills and entrepreneurial spirit. One particularly popular and practical product to offer is a handcrafted wine rack. These functional pieces of art can add elegance and sophistication to any home décor while serving a practical purpose. This guide delves into the art of building stylish wine racks that will captivate customers and enhance your booth's appeal at craft fairs and markets.

    Choosing the Right Materials

    The choice of materials significantly influences the final aesthetic and functionality of your wine racks. Selecting the right combination will determine the style, durability, and cost of your creations. Here are some common and versatile options to consider:

    Wood

    Wood remains a timeless and popular choice for wine racks due to its natural beauty, durability, and versatility. Different wood types offer unique characteristics:

    • Hardwoods, like oak, maple, and walnut, boast rich colors, sturdy grain patterns, and excellent durability, making them ideal for high-end wine racks.
    • Softwoods, such as pine and cedar, are more affordable, lightweight, and offer a rustic charm. They are well-suited for smaller-scale projects or minimalist designs.
    • Reclaimed wood adds a unique character and sustainable appeal to your wine racks. You can find salvaged wood from old barns, pallets, or other sources.

    Metal

    Metal offers a contemporary and industrial touch to wine racks. Popular choices include:

    • Steel is robust, versatile, and can be easily welded or shaped. It provides a sleek and modern aesthetic.
    • Copper adds a touch of warmth and elegance to wine racks. Its natural patina develops over time, adding to its charm.
    • Iron is sturdy and durable, offering a rustic and vintage look. It can be forged into intricate designs or left raw for a more industrial appeal.

    Other Materials

    Beyond traditional wood and metal, consider incorporating other materials for unique designs:

    • Acrylic offers a transparent and modern aesthetic, allowing the wine bottles to be displayed prominently.
    • Bamboo is an eco-friendly and sustainable material with a natural warmth that adds a touch of Asian-inspired design.
    • Rope can be incorporated into designs for a rustic and nautical feel, adding a touch of texture and visual interest.

    Designing Stylish Wine Racks

    With the materials chosen, focus on crafting an attractive and functional design. Consider the following aspects:

    Size and Shape

    Determine the size and shape of your wine rack based on the intended purpose. For single-bottle displays, a compact and minimalist design might suffice. For larger collections, a multi-tiered or wall-mounted rack could be more suitable. Experiment with different shapes, such as rectangular, circular, or triangular, to create a unique and visually appealing design.

    Style and Aesthetics

    Consider the overall style and aesthetic of your wine racks. Do you prefer a rustic, modern, minimalist, or industrial look? Choose materials, finishes, and design elements that complement your desired style. For a rustic look, use reclaimed wood with a natural finish. For a modern aesthetic, opt for sleek metal with clean lines. Embrace the opportunity to showcase your individual artistic flair.

    Functionality

    Ensure that your wine racks are functional and practical. The bottles should be securely held and easily accessible. Consider incorporating features like bottle dividers, labels, or storage compartments for additional functionality. If designing wall-mounted racks, pay attention to the load-bearing capacity of the wall material.

    Customization Options

    Offer customization options to enhance the appeal of your wine racks. Allow customers to choose the wood type, finish, size, or even personalized engravings for a truly unique piece. These options cater to individual tastes and preferences, increasing customer satisfaction and sales.

    Construction Techniques

    The construction methods employed directly affect the durability and overall quality of your wine racks. Familiarize yourself with the following techniques:

    Woodworking

    For wooden wine racks, you can use various woodworking techniques, such as:

    • Dado joints: These strong and secure joints are created by cutting grooves in the wood pieces that interlock. They are ideal for creating stable and durable structures.
    • Mortise and tenon joints: This traditional joinery technique involves cutting a hole (mortise) in one piece of wood and a protruding peg (tenon) on the other. They provide strong and aesthetically pleasing joints.
    • Pocket holes: These hidden joints are made by drilling angled holes and using specialized screws. They offer a quick and efficient way to assemble wooden structures.

    Metalworking

    Metal wine racks require specialized metalworking techniques:

    • Welding: This process involves joining metal pieces using heat and filler material. It's a robust technique for creating durable and intricate designs.
    • Soldering: This technique uses a lower-melting-point solder to join metal pieces. It's suitable for delicate and intricate designs, especially with copper and other soft metals.
    • Bending: Metal can be bent and shaped using various tools to create curves, angles, and custom forms.

    Finishing Touches

    Finishing touches are crucial for enhancing the visual appeal and durability of your wine racks. Here are some essential steps:

    Sanding

    Sanding smooths out rough edges and creates a consistent surface for the finish. Use progressively finer grits of sandpaper to achieve a smooth and polished finish.

    Painting or Staining

    Painting or staining adds color and protection to your wine racks. Use high-quality paint or stain suitable for your chosen material. Consider applying multiple coats for optimal coverage and durability.

    Sealing

    Sealing protects your wine racks from moisture, stains, and wear and tear. Polyurethane, wax, or oil-based finishes are commonly used, depending on the desired level of protection and aesthetic effect.

    Marketing and Display

    A well-presented booth at craft fairs and markets is crucial to attracting customers and making sales. Consider the following strategies:

    Booth Setup

    Create a visually appealing and inviting booth that showcases your wine racks effectively. Use high-quality backdrops, lighting, and signage to enhance the presentation. Group your wine racks according to style, material, or size to create a cohesive display.

    Pricing

    Set competitive prices for your wine racks based on the materials, time, and effort invested. Consider offering discounts for multiple purchases or special promotions to encourage sales.

    Customer Interaction

    Engage with customers in a friendly and knowledgeable manner. Explain the unique features and benefits of your wine racks, and answer any questions they may have. Encourage hands-on interaction by allowing customers to examine the racks and imagine them in their homes.

    Online Presence

    Promote your wine racks online through social media, your website, or online marketplaces. Showcase your creations, offer discounts, and encourage customers to contact you for inquiries.

    Conclusion

    Building stylish wine racks for craft fairs and markets is a rewarding and profitable endeavor. By carefully selecting materials, designing functional and aesthetically pleasing pieces, and presenting your work effectively, you can create a successful business venture that showcases your artistic talent and craftsmanship.

    Remember, customer satisfaction is paramount. Focus on creating high-quality, unique wine racks that meet the needs and desires of your customers. As you gain experience and refine your skills, you can expand your offerings and further explore the creative possibilities of wine rack design. Good luck with your crafting adventures!

    Read more

    Top Birdhouse Styles That Buyers Look For

    0

    Top Birdhouse Styles That Buyers Look For

    Top Birdhouse Styles That Buyers Look For

    Birdhouses have become an increasingly popular addition to backyards and gardens, offering a delightful way to attract feathered friends and enhance the natural beauty of the surroundings. With a wide array of styles available, choosing the perfect birdhouse can be a daunting task. To assist discerning buyers, this article explores the top birdhouse styles that consistently capture the hearts of bird enthusiasts.

    Classic Birdhouses

    Classic birdhouses are timeless designs that exude a sense of charm and nostalgia. These traditional styles have stood the test of time and remain beloved for their simplicity and elegance. The most recognizable feature of a classic birdhouse is its simple rectangular or square shape, typically with a pitched roof and a small entrance hole.

    Colonial Birdhouses

    Colonial birdhouses are inspired by the architectural style of colonial America, featuring a classic gable roof with a distinctive overhang and decorative trim. They often have a small, rectangular base and a single entrance hole centered on the front. These birdhouses evoke a sense of history and add a touch of sophistication to any outdoor space.

    Victorian Birdhouses

    Victorian birdhouses embrace the ornate and intricate details that characterized the Victorian era. These birdhouses often feature elaborate scrollwork, decorative accents, and a variety of roof shapes, such as gables, turrets, or even cupolas. They can be crafted from a range of materials, including wood, metal, or even ceramic, and are known for their whimsical and charming appearance.

    Modern Birdhouses

    Modern birdhouses break away from traditional designs, embracing contemporary aesthetics and innovative materials. They often feature clean lines, geometric shapes, and minimalist detailing. These birdhouses are designed to seamlessly integrate into modern landscapes and add a touch of sophistication to any outdoor environment.

    Geometric Birdhouses

    Geometric birdhouses feature bold, angular shapes that create a visually striking presence. They may be crafted in the form of cubes, cylinders, or pyramids, with contrasting colors and textures to add depth and interest. These birdhouses are ideal for those seeking a modern and edgy look.

    Minimalist Birdhouses

    Minimalist birdhouses prioritize simplicity and functionality. They often have a simple, uncluttered design with a single entrance hole and a flat roof. They may be crafted from natural materials like wood or bamboo, or from modern materials like metal or acrylic.

    Specialty Birdhouses

    Specialty birdhouses are designed to cater to specific bird species or offer unique features. They can be found in a wide range of shapes, sizes, and materials, reflecting the creativity of birdhouse enthusiasts.

    Bluebird Houses

    Bluebird houses are specifically designed to attract bluebirds. They typically have a single entrance hole that is relatively small, around 1.5 inches in diameter, to deter larger birds. They are often crafted from wood and may feature a removable floor for easy cleaning.

    Squirrel-Proof Birdhouses

    Squirrel-proof birdhouses are designed to protect birds from pesky squirrels. They feature various deterrents, such as a metal shield around the entrance hole, a slippery surface, or a baffle that discourages squirrels from climbing. These birdhouses provide a safe haven for birds, ensuring they have a peaceful place to nest and raise their young.

    Hanging Birdhouses

    Hanging birdhouses are designed to be suspended from a branch or a hook. They often have a rounded shape or a dome-like roof, providing shelter and protection from the elements. Hanging birdhouses are a popular choice for those seeking a whimsical and space-saving option.

    Factors to Consider When Choosing a Birdhouse

    When selecting a birdhouse, several factors should be taken into account to ensure it meets the specific needs of the birds and the aesthetic preferences of the homeowner.

    Bird Species

    Different bird species have different preferences for nest boxes. It's essential to consider the size and shape of the entrance hole, the depth of the nesting cavity, and the overall dimensions of the birdhouse. For example, small songbirds require smaller houses with entrance holes around 1.25 inches in diameter, while larger birds like woodpeckers need larger houses with entrance holes of 2 inches or more.

    Material

    Birdhouses are typically made from a variety of materials, each with its own advantages and disadvantages. Wood is a natural and attractive choice, but it requires regular maintenance to prevent decay. Metal birdhouses are durable and long-lasting but can become hot in direct sunlight. Plastic birdhouses are affordable and easy to clean, but they may not be as aesthetically pleasing as other materials.

    Placement

    The placement of a birdhouse is crucial to its success in attracting birds. It should be located in a quiet and sheltered spot, away from predators and disturbances. The entrance hole should face away from prevailing winds and heavy rainfall. For optimal results, place the birdhouse at least 5 feet above the ground and at least 10 feet away from any trees or shrubs that could provide hiding spots for predators.

    Maintenance

    Regular maintenance is essential to keep a birdhouse clean and safe for its feathered occupants. Clean the birdhouse thoroughly after each nesting season to remove debris, droppings, and parasites. Check for any damage or signs of wear and repair or replace the birdhouse as needed.

    Conclusion

    Choosing the perfect birdhouse is a delightful journey that allows bird enthusiasts to express their individuality and create a welcoming haven for feathered friends. From classic designs to modern styles, there's a birdhouse to suit every taste and preference. By considering factors such as bird species, material, placement, and maintenance, buyers can find a birdhouse that not only attracts birds but also enhances the natural beauty of their outdoor spaces.

    Read more

    Download Free PDF Plans to Build a Stylish Bedside Cabinet

    0

    Download Free PDF Plans to Build a Stylish Bedside Cabinet

    Download Free PDF Plans to Build a Stylish Bedside Cabinet

    A bedside cabinet is an essential piece of furniture in any bedroom. It provides a convenient place to store books, lamps, alarm clocks, and other necessities. A well-designed bedside cabinet can also add a touch of style and elegance to your bedroom décor. If you're looking for a way to add a unique and personal touch to your bedroom, building your own bedside cabinet is a great option.

    Building a bedside cabinet from scratch can be a rewarding experience, and with the right plans, it's also surprisingly easy. In this article, we'll guide you through the process of finding free PDF plans to build a stylish bedside cabinet, from choosing the right plan to selecting materials and assembling your masterpiece.

    Why Choose Free PDF Plans?

    Free PDF plans offer a number of advantages over purchasing pre-made plans or relying on DIY tutorials. Here's why they're a great choice for your bedside cabinet project:

    • Cost-Effective: Free plans eliminate the upfront cost of purchasing plans, allowing you to stretch your budget further.
    • Wide Selection: You'll find a vast array of free plans online, offering diverse styles, sizes, and complexities to match your taste and skill level.
    • Printable and Convenient: PDF format provides easy access and printing, allowing you to refer to the plans anytime, anywhere.
    • Detailed Instructions: Most free PDF plans are comprehensive and include detailed step-by-step instructions, cutting lists, and assembly diagrams.

    Finding Free PDF Plans: Resources and Tips

    The internet is a treasure trove of free PDF plans for various projects, including bedside cabinets. Here are some reliable sources and tips for finding the perfect plans for your needs:

    Popular Online Platforms

    • Ana White: Ana White's website is a go-to resource for DIY furniture plans, offering a range of free bedside cabinet designs.
    • Instructables: This platform features user-submitted projects and instructions, including numerous free bedside cabinet plans.
    • Pinterest: Pinterest is a great platform for visual inspiration. You can find countless images and links to free PDF plans for bedside cabinets.
    • Free Plans Websites: Websites dedicated to providing free DIY plans, such as Woodworking for Mere Mortals and FreeWoodworkingPlans.com, are excellent starting points.

    Tips for Choosing the Right Plan

    • Define Your Needs: Before you start searching, determine the size, style, and features you need in your bedside cabinet.
    • Consider Skill Level: Choose plans that align with your woodworking expertise. Start with beginner-friendly plans if you're new to woodworking.
    • Review Plan Details: Carefully examine the PDF plans to ensure they include all the necessary information: cutting lists, assembly diagrams, and clear instructions.
    • Read User Reviews: If available, check user reviews or comments on the plans to get an idea of their quality and ease of use.

    Essential Materials for Your Bedside Cabinet

    Once you've chosen your free PDF plans, you'll need to gather the necessary materials. Common materials used for bedside cabinets include:

    • Wood: Plywood, MDF, or solid wood (like pine or oak) are popular choices. Consider factors like durability, cost, and desired aesthetic.
    • Hardware: Hinges, drawer slides, knobs, and handles are essential for functionality and style.
    • Fasteners: Screws, nails, and glue are needed to secure the cabinet parts.
    • Finish: Paint, stain, or varnish can enhance the look and protect the wood.
    • Tools: You'll need basic woodworking tools, including a saw, drill, sander, and measuring tape.

    Building Your Stylish Bedside Cabinet: Step-by-Step Guide

    With your chosen PDF plans and materials ready, you're ready to start building your bedside cabinet. Here's a general step-by-step guide to help you along the way:

    Step 1: Cutting and Preparation

    • Carefully review the cutting list provided in your PDF plans.
    • Use your saw to accurately cut the wood according to the plan dimensions.
    • Sand the edges and surfaces of all wood pieces to create a smooth finish.

    Step 2: Assembly

    • Follow the assembly instructions in your plans step-by-step.
    • Use glue and fasteners to secure the cabinet parts, ensuring a strong and stable structure.
    • Install drawer slides, hinges, and hardware as directed.

    Step 3: Finishing Touches

    • Sand any rough spots or imperfections for a smooth surface.
    • Apply your chosen finish, such as paint, stain, or varnish, following the manufacturer's instructions.
    • Allow the finish to dry completely before moving on to the next step.

    Step 4: Installation

    • Place your completed bedside cabinet next to your bed, ensuring it's level and stable.
    • Secure the cabinet to the wall if necessary, using appropriate mounting hardware.

    Conclusion

    Building your own bedside cabinet is a fulfilling project that allows you to create a piece of furniture perfectly tailored to your needs and style. With the abundance of free PDF plans available online, the process is simpler than you might think. By carefully following the instructions and selecting quality materials, you can build a stylish and functional bedside cabinet that adds a touch of personality to your bedroom.

    So, unleash your creativity, gather your tools, and start building! You'll enjoy the satisfaction of creating something unique and beautiful for your home.

    Read more

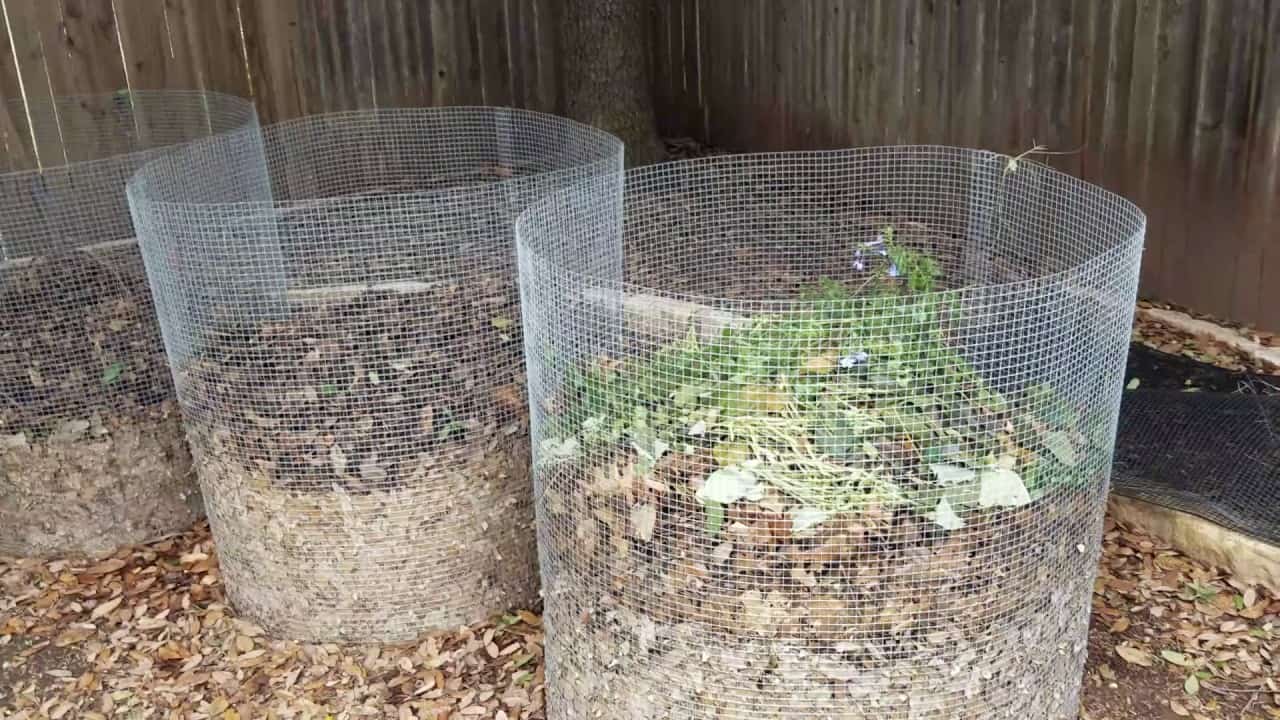
    How to Make a Compost Bin from Recycled Materials

    0

    How to Make a Compost Bin from Recycled Materials

    Turn Trash into Treasure: Building a Compost Bin from Recycled Materials

    Hey there, fellow earth lovers! Ready to ditch the landfill and transform your kitchen scraps into rich, black gold? Let's get our hands dirty and build a compost bin from recycled materials! Not only is it a super eco-friendly way to manage your food waste, but it's also a fun and rewarding project. Plus, you'll be saving some serious cash by skipping out on buying a fancy compost bin.

    Don't worry, we're not talking about building a complex engineering marvel here. This is a simple, DIY project that's perfect for beginners. We're gonna be utilizing things you might already have lying around the house or easily find at your local recycling center. So, let's dive in!

    Choosing Your Compost Bin Style

    First things first, you need to decide what type of compost bin you want to make. There are a bunch of awesome options out there, but we'll focus on two popular choices:

    The Three-Bin System

    This classic setup involves three separate bins. Each bin serves a different purpose:

    • Bin 1: The Hot Composting Bin - This is where the magic happens! This bin is where you add your kitchen scraps, yard waste, and other compostable materials. The heat generated by the decomposition process will break down the materials quickly.
    • Bin 2: The Curing Bin - This bin is for the finished compost. Once the materials in the hot bin have broken down, you'll transfer them to the curing bin to continue their journey to perfection. The curing process helps the compost mature and become more stable.
    • Bin 3: The Storage Bin - This bin is your "waitlist" for compostable materials. It's a great place to hold materials until you're ready to add them to the hot bin.

    The beauty of the three-bin system is that it allows you to keep your compost in different stages of decomposition. You can always have fresh compost ready to go!

    The Single-Bin System

    If you're looking for a simpler and more compact option, the single-bin system is perfect for you. This system is essentially a single bin where you add your materials and let nature take its course. It's not as efficient as the three-bin system in terms of speed, but it's super easy to manage and requires less space.

    Gathering Your Recycled Treasures

    Now that you've chosen your compost bin style, it's time to get creative with your recycled materials. Here are some ideas to get your gears turning:

    • Wooden Pallets - These are a fantastic, readily available resource. They can be used to build both the three-bin and single-bin systems. Just make sure the wood is free of any harmful chemicals or treatments.
    • Plastic Storage Bins - Those sturdy, colorful bins you use to store your belongings are perfect for creating compost bins. You can use them to build the three-bin system or even stack them to create a single-bin setup.
    • Metal Trash Cans - Old metal trash cans, particularly those with lids, make excellent compost bins. The metal is durable and helps retain heat. Just make sure there are no holes or leaks.
    • Old Tires - If you have some old tires lying around, they can be used to create a unique and interesting compost bin. You can stack them on top of each other or create a circle. Just make sure the tires are clean and free of any harmful chemicals.
    • Concrete Blocks - Concrete blocks can be used to build the walls of your compost bin. They provide a sturdy and long-lasting structure.

    Building Your Compost Bin

    Okay, now for the fun part! Let's build that compost bin! Here's a basic guide for constructing a three-bin system using wooden pallets:

    1. Prepare the Pallets: Clean the pallets thoroughly and remove any nails, staples, or loose boards. Use a saw to cut the pallets to the desired size for your bins. It's a good idea to choose pallets with a similar width and height for a uniform look.
    2. Assemble the Bins: For each bin, you'll need three pallet sections. Attach the sections to each other using screws or heavy-duty nails to create a rectangular frame. Make sure the joints are strong and secure. For the hot and curing bins, you'll need a bottom made of mesh wire or chicken wire. This allows for air circulation and drainage. For the storage bin, a solid bottom is fine. You can use wood scraps or even heavy-duty cardboard.
    3. Create the Three-Bin Configuration: Arrange the three bins side by side, leaving a small gap between them for easy access. If you want to, you can attach the bins to each other using screws or heavy-duty brackets for a more stable structure.
    4. Add a Lid (Optional): A lid can help retain heat and moisture in the hot bin, but it's not essential. You can use a piece of wood or even a large piece of plastic sheeting to create a simple lid. Make sure the lid is secured so it won't blow away in the wind.

    For a single-bin system, you'll essentially follow the same steps, but you'll only need to build one bin. You can use any of the recycled materials mentioned earlier to construct it.

    Composting: The Art of Turning Waste into Gold

    Now that your compost bin is built, it's time to start composting! Here are some tips for a successful compost pile:

    • Balance Your Green and Browns: Compost requires a balance of "green" materials (nitrogen-rich) and "brown" materials (carbon-rich). Think of it as a perfect harmony of food scraps (green) and yard waste (brown). A good ratio is about 2 parts brown to 1 part green.
    • Add Water Regularly: Your compost needs to be moist, but not soggy. Think of the consistency of a wrung-out sponge. Add water regularly, especially during dry periods.
    • Turn Your Compost: To ensure even decomposition, turn your compost pile regularly. You can do this every couple of weeks using a pitchfork or garden rake. This helps aerate the compost and allows for proper oxygen flow.
    • Avoid Certain Materials: Not everything is compostable. Stay away from meat, bones, dairy products, oils, and diseased plants. These materials can attract pests and can slow down the decomposition process.

    The Rewards of Composting

    Composting isn't just about reducing waste; it's about nurturing your garden and enriching the soil. Here's what you can expect from your compost:

    • Healthy Soil: Compost adds essential nutrients and improves soil structure, creating a thriving environment for your plants.
    • Reduced Waste: By composting, you're diverting waste from landfills and promoting a more sustainable lifestyle.
    • Free Fertilizer: Compost is a fantastic natural fertilizer that can help you grow healthy and vibrant plants.
    • Sense of Accomplishment: There's something incredibly satisfying about watching your kitchen scraps transform into rich, black gold. It's a reminder of the interconnectedness of nature and the power of simple actions.

    So, what are you waiting for? Get creative, gather your recycled materials, and start building your own compost bin today! It's a rewarding journey that will benefit you, your garden, and the planet. Happy composting!

    Read more

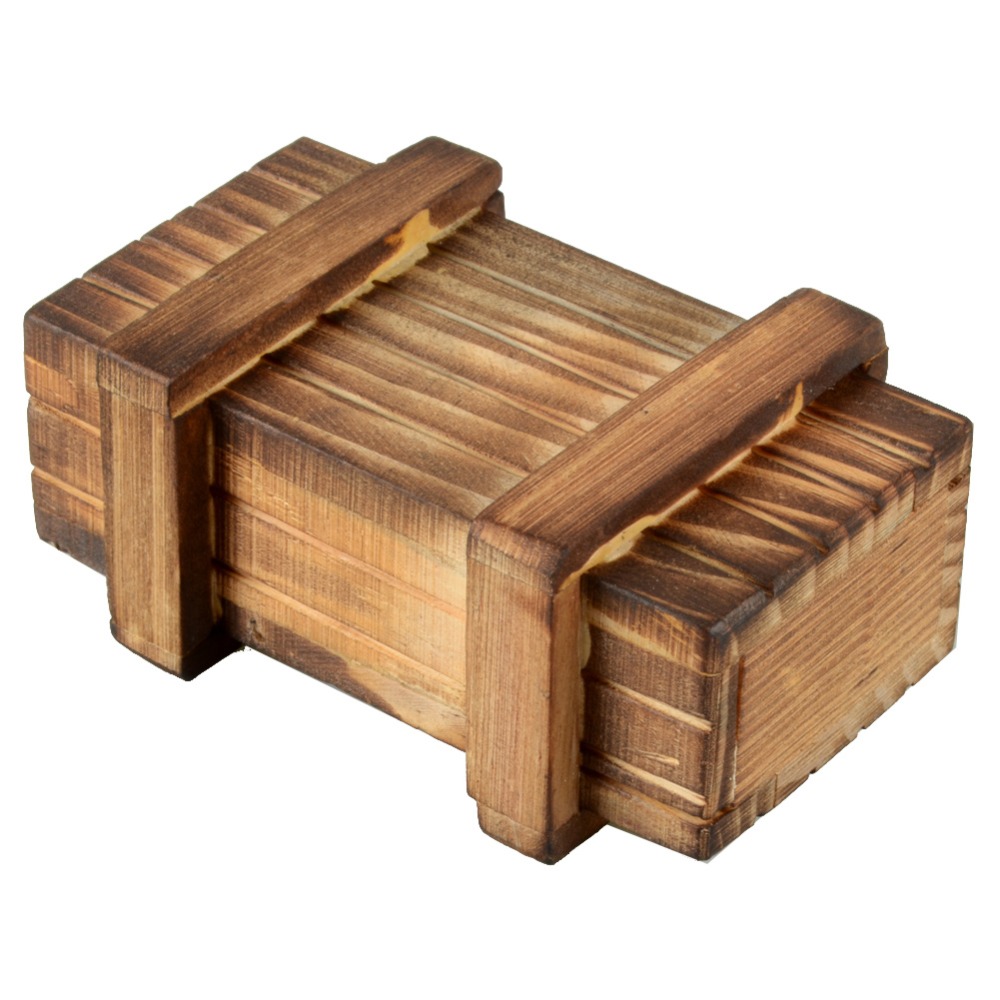
    Diy wooden magic box: a beginner-friendly guide

    0

    Diy wooden magic box: a beginner-friendly guide

    DIY Wooden Magic Box: A Beginner-Friendly Guide

    Unlock the magic of woodworking and create a captivating wooden magic box with this beginner-friendly guide. This project combines simple techniques with a touch of creative flair, allowing you to construct a stunning and functional piece of art. Whether you’re a seasoned woodworker or just starting out, this guide will walk you through each step, ensuring a smooth and rewarding experience.

    Gather Your Supplies

    Before embarking on your magical journey, ensure you have all the necessary tools and materials at hand. Here’s a comprehensive list:

    Wood

    • One piece of plywood or hardwood (approximately 12" x 12" x ½") for the base and lid
    • Four pieces of wood (approximately 4" x 4" x ½") for the sides
    • Two pieces of wood (approximately 3" x 4" x ½") for the hinges

    Tools

    • Saw (circular saw or jigsaw)
    • Drill
    • Sandpaper (various grits)
    • Screwdriver or drill bits for screws
    • Wood glue
    • Clamps
    • Measuring tape
    • Pencil
    • Wood stain or paint (optional)
    • Finishing sealant (optional)

    Construct the Base and Lid

    Begin by creating the foundation of your magic box. Use your saw to cut the plywood or hardwood into two squares, each measuring 12" x 12". These squares will form the base and the lid. Ensure all edges are clean and straight. Now, carefully sand the edges of both squares using sandpaper to create a smooth and polished finish.

    Assembling the Sides

    Next, cut four pieces of wood into 4" x 4" squares to form the sides of the box. Use wood glue to secure each side to the base, ensuring they are flush with the edges. Secure the sides in place using clamps, allowing the glue to dry completely.

    Crafting the Hinges

    To create the hinges, cut two pieces of wood into 3" x 4" rectangles. Carefully drill two holes along the length of each rectangle, spaced approximately ½" apart. These holes will accommodate the screws for attaching the hinges to the box.

    Attaching the Hinges

    Align the hinges with the top edge of the box and attach them using screws. Ensure the hinges are positioned evenly on both sides. Now, carefully attach the lid to the hinges, making sure it aligns perfectly with the base.

    Adding a Finishing Touch

    To enhance the visual appeal of your wooden magic box, consider staining or painting it with your preferred color. Alternatively, you can apply a clear sealant to protect the wood and give it a glossy finish. Allow the stain, paint, or sealant to dry completely before proceeding.

    The Final Touches

    Congratulations! Your DIY wooden magic box is complete. Decorate it with your own personal touch, adding embellishments like decorative knobs, intricate carvings, or even hidden compartments to further enhance its charm. As you create, envision the secrets and mysteries your box will hold, adding a touch of enchantment to your world.

    Read more

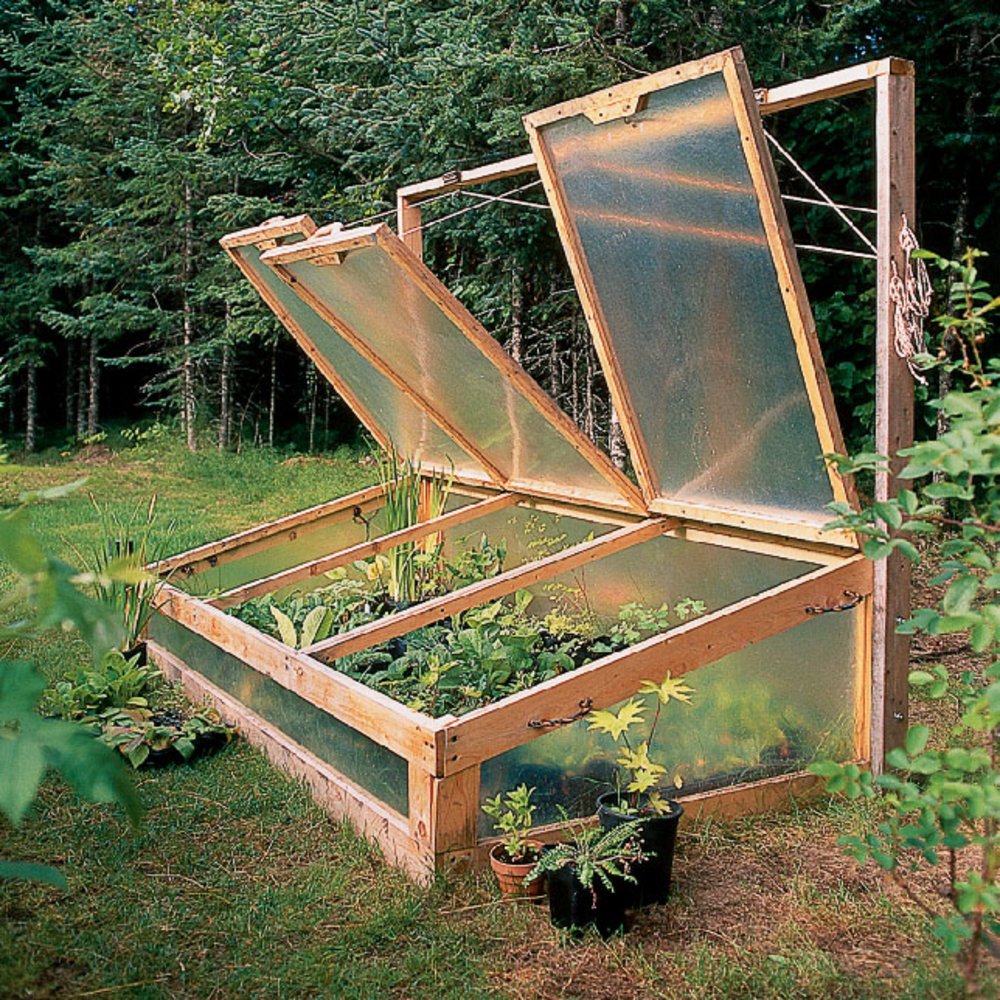
    Winter Gardening Tips: Cold Frame Plans

    0

    Winter Gardening Tips: Cold Frame Plans

    Winter Gardening Tips: Cold Frame Plans

    Winter gardening can be a rewarding experience, extending the growing season and providing fresh produce even when the weather is cold. A cold frame is an essential tool for winter gardening, acting as a mini-greenhouse that protects plants from frost and harsh conditions. This article delves into the benefits of cold frames and provides comprehensive plans for building your own, empowering you to cultivate a thriving winter garden.

    Benefits of Using a Cold Frame

    Cold frames offer numerous advantages for winter gardening:

    • Extended Growing Season: Cold frames create a microclimate that is warmer than the surrounding air, allowing you to grow plants earlier in the spring and later in the fall.
    • Frost Protection: The glass or plastic cover of a cold frame traps heat from the sun, preventing frost damage to delicate plants.
    • Improved Seed Germination: The warmer soil temperatures within a cold frame promote faster and more successful seed germination.
    • Reduced Heating Costs: Cold frames utilize solar energy to warm the plants, minimizing the need for artificial heating.
    • Pest Control: The enclosed environment of a cold frame helps to deter pests and insects.
    • Water Conservation: The enclosed space reduces water evaporation, helping to conserve water resources.

    Cold Frame Design Considerations

    Before constructing your cold frame, consider these important factors:

    Location

    Choose a sunny location with good drainage. The cold frame should receive at least 6 hours of direct sunlight per day, ideally facing south.

    Size and Shape

    The size of your cold frame will depend on your gardening needs. A typical cold frame is 4 feet wide by 8 feet long, but smaller or larger versions can be built. The shape can be rectangular, square, or even curved.

    Materials

    Cold frames can be made from various materials, including:

    • Wood: Wood is a durable and aesthetically pleasing material. It can be treated with weather-resistant sealant for longevity.
    • Concrete Blocks: Concrete blocks are sturdy and readily available. They offer good insulation and longevity.
    • Metal: Metal frames are lightweight and can be easily assembled. However, they may require rust protection.
    • Recycled Materials: Old windows, pallets, or other materials can be repurposed to create a cold frame.

    Covering

    The covering of a cold frame is crucial for trapping heat and protecting plants. Common options include:

    • Glass: Glass is a good insulator, but it can be heavy and fragile.
    • Plastic: Plastic is lightweight, inexpensive, and readily available. However, it can tear easily and may not be as durable as glass.
    • Polycarbonate: Polycarbonate is a durable, transparent plastic that is resistant to breakage and UV rays. It is a good choice for long-lasting cold frames.

    Cold Frame Plans

    Here are two detailed plans for building a cold frame:

    Wood Frame Cold Frame Plan

    Materials:

    • 4x4 lumber for the frame (8 pieces)
    • 1x6 lumber for the sides (8 pieces)
    • 1/2-inch plywood for the bottom
    • Glass or plastic for the cover
    • Wood screws
    • Weather-resistant sealant
    • Hinges
    • Latch

    Instructions:

    1. Cut the 4x4 lumber to the desired length for the frame.
    2. Assemble the frame using wood screws, creating a rectangle or square.
    3. Cut the 1x6 lumber to the desired height for the sides.
    4. Attach the side boards to the frame using screws.
    5. Cut a piece of plywood to fit the bottom of the frame.
    6. Attach the plywood to the frame with screws.
    7. Cut the glass or plastic to the desired size for the cover.
    8. Attach hinges to the cover and frame.
    9. Install a latch to secure the cover.
    10. Apply weather-resistant sealant to all joints and seams.

    Concrete Block Cold Frame Plan

    Materials:

    • Concrete blocks (20-30)
    • Wooden frame for the cover (optional)
    • Glass or plastic for the cover
    • Mortar mix
    • Hinges
    • Latch

    Instructions:

    1. Lay out the concrete blocks in the desired shape for the frame.
    2. Use mortar mix to bond the blocks together, creating a strong and durable structure.
    3. Construct a wooden frame for the cover (optional).
    4. Cut the glass or plastic to the desired size for the cover.
    5. Attach hinges to the cover and frame.
    6. Install a latch to secure the cover.

    Cold Frame Maintenance

    Proper maintenance is essential for keeping your cold frame in optimal condition and extending its lifespan:

    • Ventilation: Open the cover on sunny days to allow for air circulation and prevent overheating. Close it at night to conserve heat.
    • Watering: Water your plants regularly, as the enclosed environment can dry out quickly.
    • Cleaning: Clean the inside and outside of the cold frame regularly to remove dirt and debris.
    • Inspection: Regularly check for damage to the frame, cover, and hinges.

    Cold Frame Gardening Tips

    Here are some additional tips for successful winter gardening in a cold frame:

    • Choose Cold-Hardy Plants: Select plants that are known for their tolerance to cold temperatures, such as lettuce, spinach, kale, carrots, and radishes.
    • Start Seeds Indoors: For earlier harvests, start seeds indoors and transplant them into the cold frame when they are a few weeks old.
    • Provide Insulation: Add a layer of straw or other insulating material to the bottom of the cold frame to further protect plants from frost.
    • Monitor Temperatures: Use a thermometer to track the temperature inside the cold frame. Adjust the cover as needed to maintain optimal temperatures for your plants.
    • Protect from Wind: Place a windbreak around the cold frame to reduce windchill and protect plants from cold winds.

    By following these tips and plans, you can successfully build and utilize a cold frame to extend your growing season and enjoy fresh produce throughout the winter months.

    Read more

    BeginnerÂ’s Cold Frame Plans for Easy Gardening

    0

    Beginner’s Cold Frame Plans for Easy Gardening

    Beginner’s Cold Frame Plans for Easy Gardening

    A cold frame is a simple, inexpensive structure that extends your gardening season by providing a protected environment for plants. It acts as a mini-greenhouse, trapping solar heat and protecting plants from the elements, allowing you to start seeds earlier in the spring and extend the growing season into the fall.

    This article will guide you through the steps of building your own cold frame, providing you with clear instructions and helpful tips for a successful project. You’ll learn about the materials needed, the construction process, and valuable tips for using your cold frame effectively.

    Benefits of Using a Cold Frame

    Investing in a cold frame offers numerous advantages for gardeners of all levels:

    • Extended Growing Season: Start seeds weeks earlier in the spring and harvest crops later in the fall, thanks to the protected environment.
    • Hardening Off Seedlings: Acclimate seedlings to outdoor conditions gradually before transplanting them into the garden.
    • Protection from Frost: Shield delicate plants from frost and cold temperatures, allowing you to grow a wider range of crops.
    • Improved Soil Moisture: The enclosed environment helps retain soil moisture, reducing the need for frequent watering.
    • Pest and Disease Control: The protective cover acts as a barrier against pests and diseases, promoting healthier plants.
    • Cost-Effective Solution: A cold frame is a relatively inexpensive way to expand your gardening capabilities.

    Choosing the Right Location for Your Cold Frame

    The location of your cold frame will greatly influence its effectiveness. Choose a spot that meets the following criteria:

    • Full Sun: Select a sunny location that receives at least six hours of direct sunlight daily. This will ensure adequate warmth for your plants.
    • Well-Drained Soil: Avoid areas prone to waterlogging, as this can damage your plants. Choose a site with well-drained soil to prevent root rot.
    • Easy Access: Ensure the location is easily accessible for tending to your plants, harvesting crops, and cleaning the frame.
    • Protection from Wind: A sheltered location is ideal to minimize wind exposure, which can cool the frame and damage delicate plants.

    Simple Cold Frame Plans: Materials and Construction

    Here's a straightforward cold frame plan that is beginner-friendly and easy to construct:

    Materials Needed:

    • Wood: Use treated lumber for durability. You will need 2x4s for the frame and 1x6s for the sides and top.
    • Plastic Sheeting: Choose clear plastic sheeting that is at least 6 mil thick for insulation and durability.
    • Screws: Use galvanized screws for outdoor use.
    • Tape Measure: For accurate measurements.
    • Level: To ensure the frame is level.
    • Circular Saw: To cut the lumber to size.
    • Drill: To drill pilot holes before screwing the wood together.
    • Safety Glasses and Gloves: For protection during construction.

    Construction Steps:

    1. Cut the Lumber: Measure and cut the lumber for the frame and sides. You will need two long pieces for the base, two shorter pieces for the ends, and four pieces for the sides.
    2. Assemble the Frame: Attach the base pieces to the end pieces using screws. Make sure the corners are square and secure.
    3. Add the Sides: Attach the side pieces to the frame, ensuring they are vertical and flush with the base. Use screws to secure them.
    4. Create the Top: Attach the top pieces to the sides, creating a hinged lid. Use screws to secure the lid and hinges.
    5. Install the Plastic: Cut the plastic sheeting to size and secure it to the frame using staples, tape, or clamps. Overlap the plastic by several inches to create a watertight seal.
    6. Place the Cold Frame: Position the cold frame in its chosen location and adjust the legs for level placement.

    Using Your Cold Frame Effectively

    Once you have constructed your cold frame, here are some essential tips for using it successfully:

    Starting Seeds:

    • Choose the Right Seeds: Select seeds that are suitable for cold frame conditions. Look for varieties that can tolerate cool temperatures.
    • Use Seed Starting Mix: Use a specialized seed starting mix that drains well and provides essential nutrients for young seedlings.
    • Water Regularly: Keep the seed starting mix moist but not soggy. Check the moisture levels daily and water as needed.
    • Provide Adequate Light: Ensure the seedlings receive adequate sunlight. Supplement with artificial light if necessary, especially during short winter days.
    • Thin Seedlings: Once seedlings have developed a few true leaves, thin them out to give them space to grow.

    Hardening Off Seedlings:

    Before transplanting seedlings into the garden, harden them off to acclimate them to outdoor conditions. This process gradually exposes them to sun, wind, and temperature fluctuations.

    • Start Gradually: Begin by opening the cold frame lid for short periods during the day, increasing the time gradually over several days.
    • Protect from Extreme Conditions: During cold nights or windy days, close the lid to protect the seedlings.
    • Transplant When Ready: Once seedlings have adapted to the outdoor environment, they are ready to be transplanted into the garden.

    Extending the Growing Season:

    A cold frame can extend your harvest season by providing a protected environment for late-season crops.

    • Choose Cold-Hardy Crops: Select crops that can tolerate cooler temperatures, such as lettuce, kale, spinach, and radishes.
    • Protect from Frost: On frosty nights, cover the cold frame with an extra layer of insulation, such as a blanket or tarp.
    • Monitor Soil Temperature: Ensure the soil temperature remains suitable for the crops you are growing.

    Maintenance Tips for Your Cold Frame

    Regular maintenance will ensure your cold frame continues to function effectively and protect your plants.

    • Clean Regularly: Remove debris and weeds from inside the frame to prevent disease and pests.
    • Check for Damage: Inspect the frame, plastic sheeting, and hinges for any damage and repair as needed.
    • Adjust Ventilation: Adjust the lid to regulate air flow and temperature inside the frame.
    • Winterize: In colder regions, prepare the cold frame for winter by removing plants, cleaning it thoroughly, and covering it with a tarp or other protective material.

    Conclusion

    Building your own cold frame is a simple and rewarding project that can significantly enhance your gardening experience. By following these plans and tips, you can easily create a protected environment for your plants, extending the growing season and enjoying fresh produce for longer periods. Embrace the benefits of a cold frame and reap the rewards of a bountiful garden.

    Read more

     
    Powered by Blogger